Quick Start
Through this quick start guide, you can start from scratch and use the BlueKing Lite Node module to complete cloud region creation, node controller installation, and hosted component (agent/collector) deployment, quickly achieving unified management of nodes and components across multi-cloud regions.
Cloud Region Management
Create a Cloud Region
Cloud regions are the logical grouping units for node resources. You must create a cloud region before managing node resources.
Step 1: Enter the Node Module
The Node module is the management hub for nodes and agents. You need to access the corresponding feature page from the console.
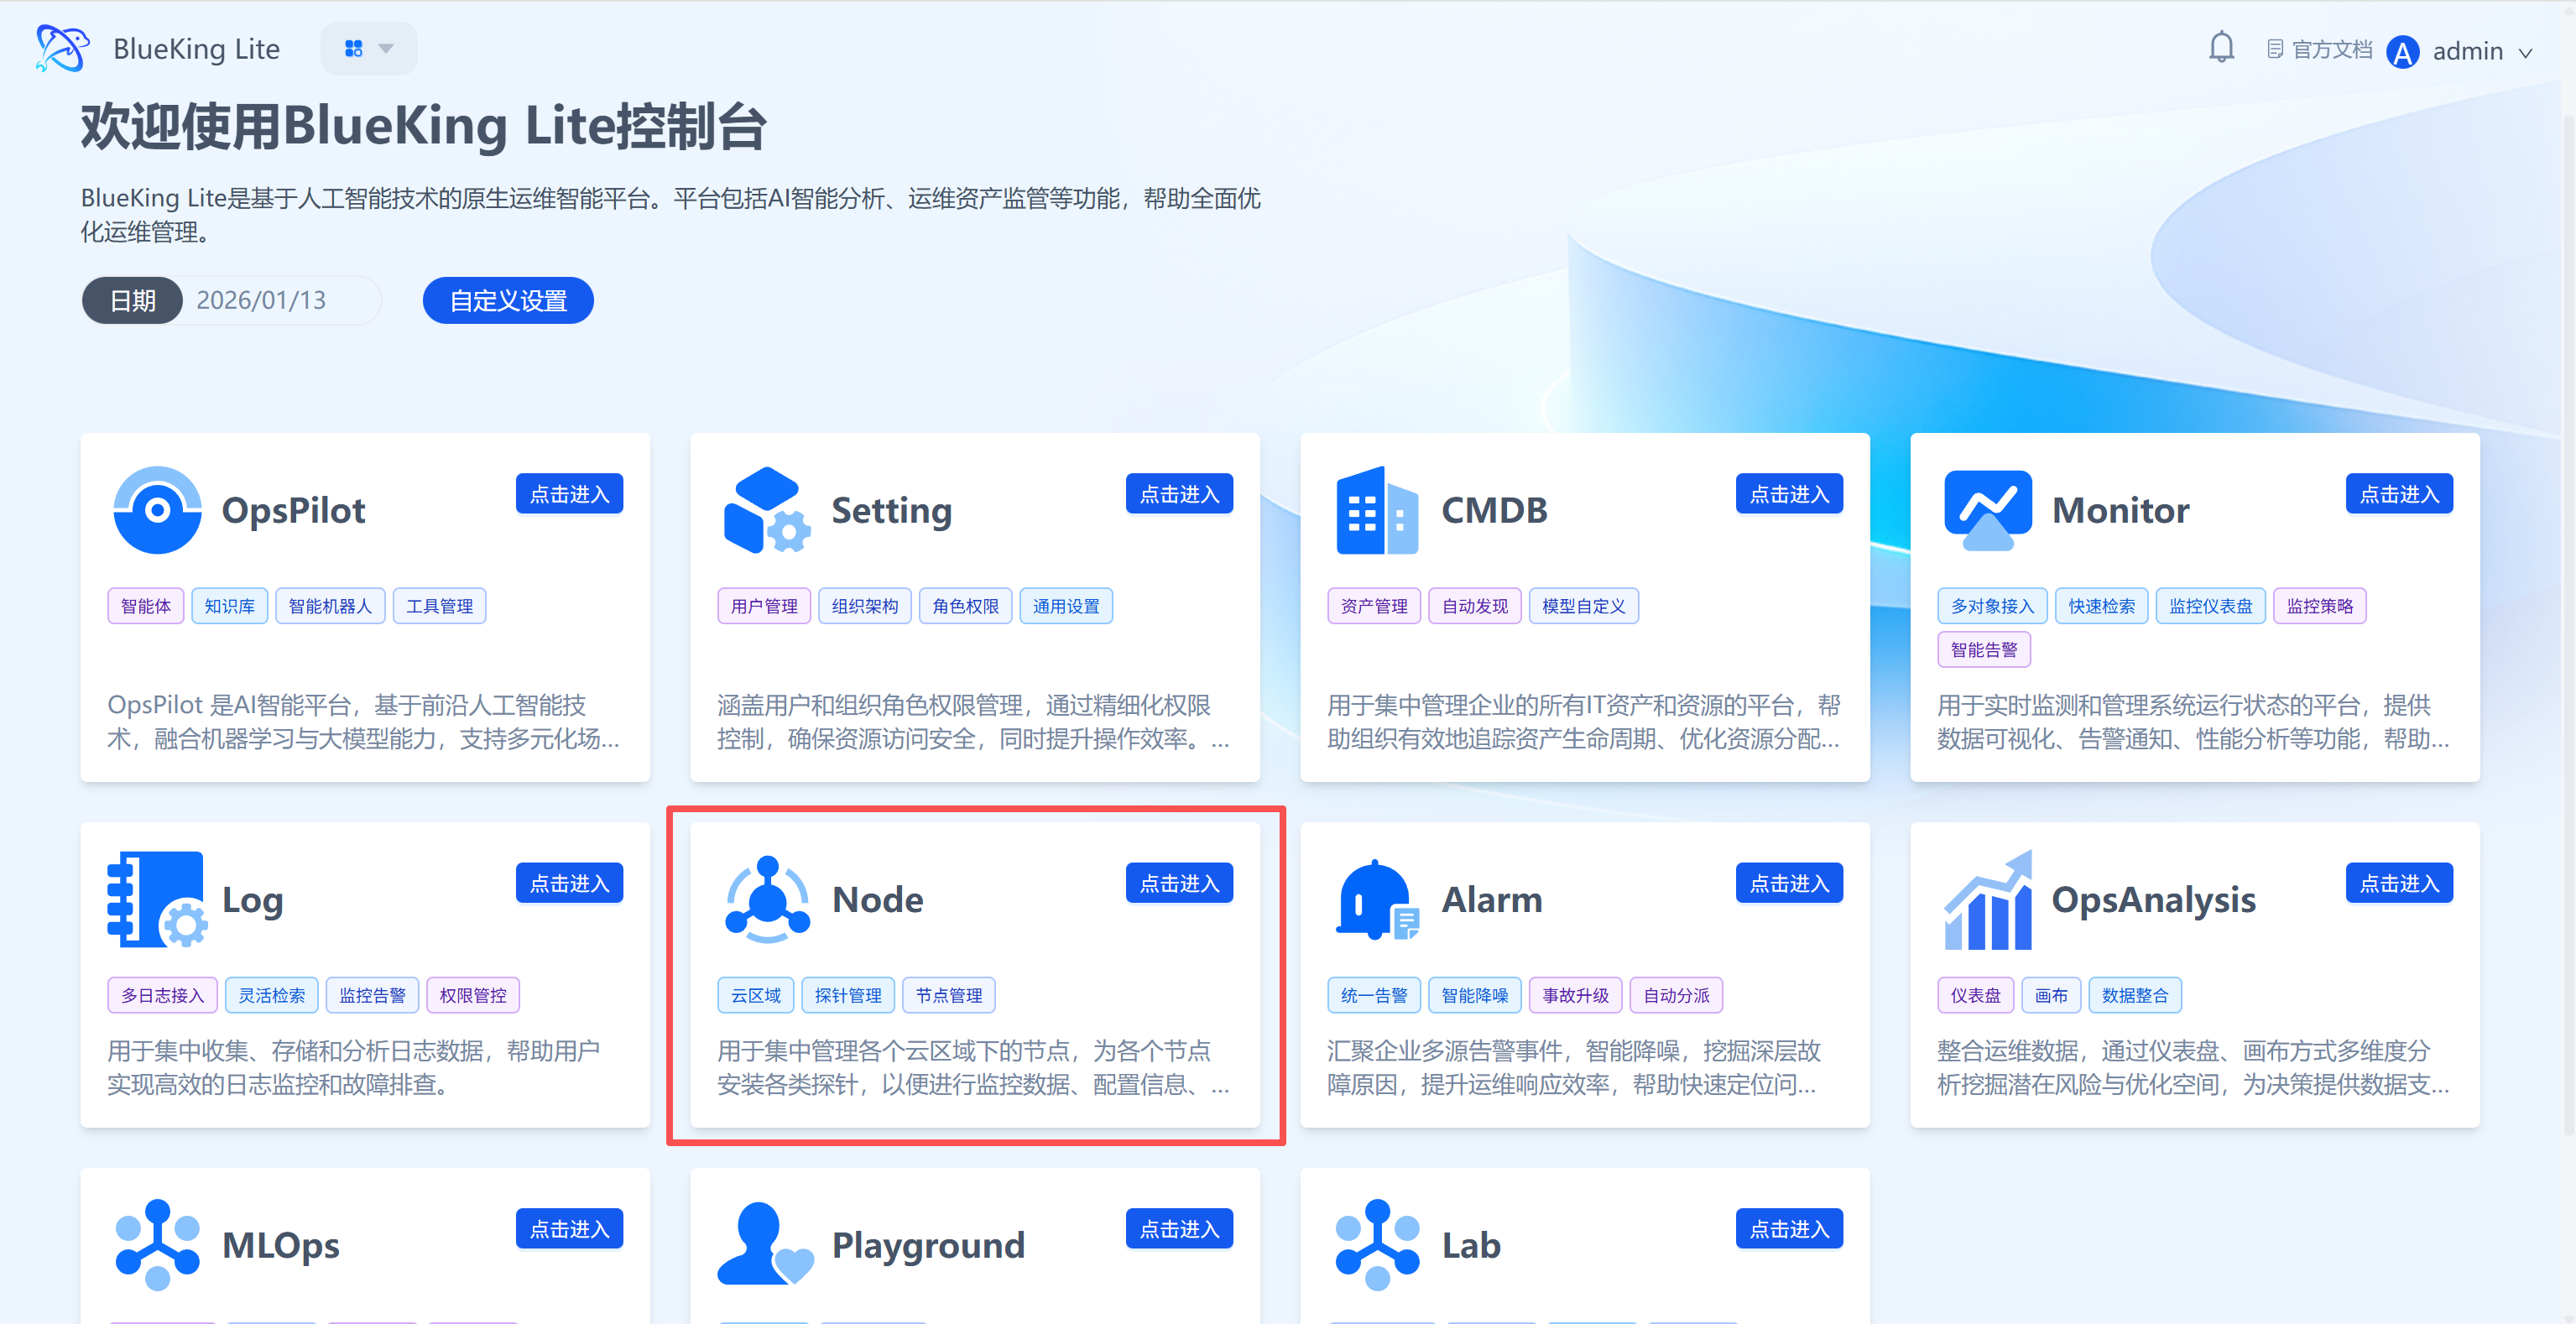
- After entering the BlueKing Lite console, find the
Nodemodule in the feature list. - Click "Enter" at the top-right corner of the module card to access the Node module main page.
UI Guide:
- Feature list area: The Node module card clearly displays core capabilities (cloud regions, agent management, etc.). Click "Enter" to access the module.
Step 2: Initiate Cloud Region Creation
The cloud region page is the top-level management interface for node resources, supporting the creation and management of nodes across different logical regions.
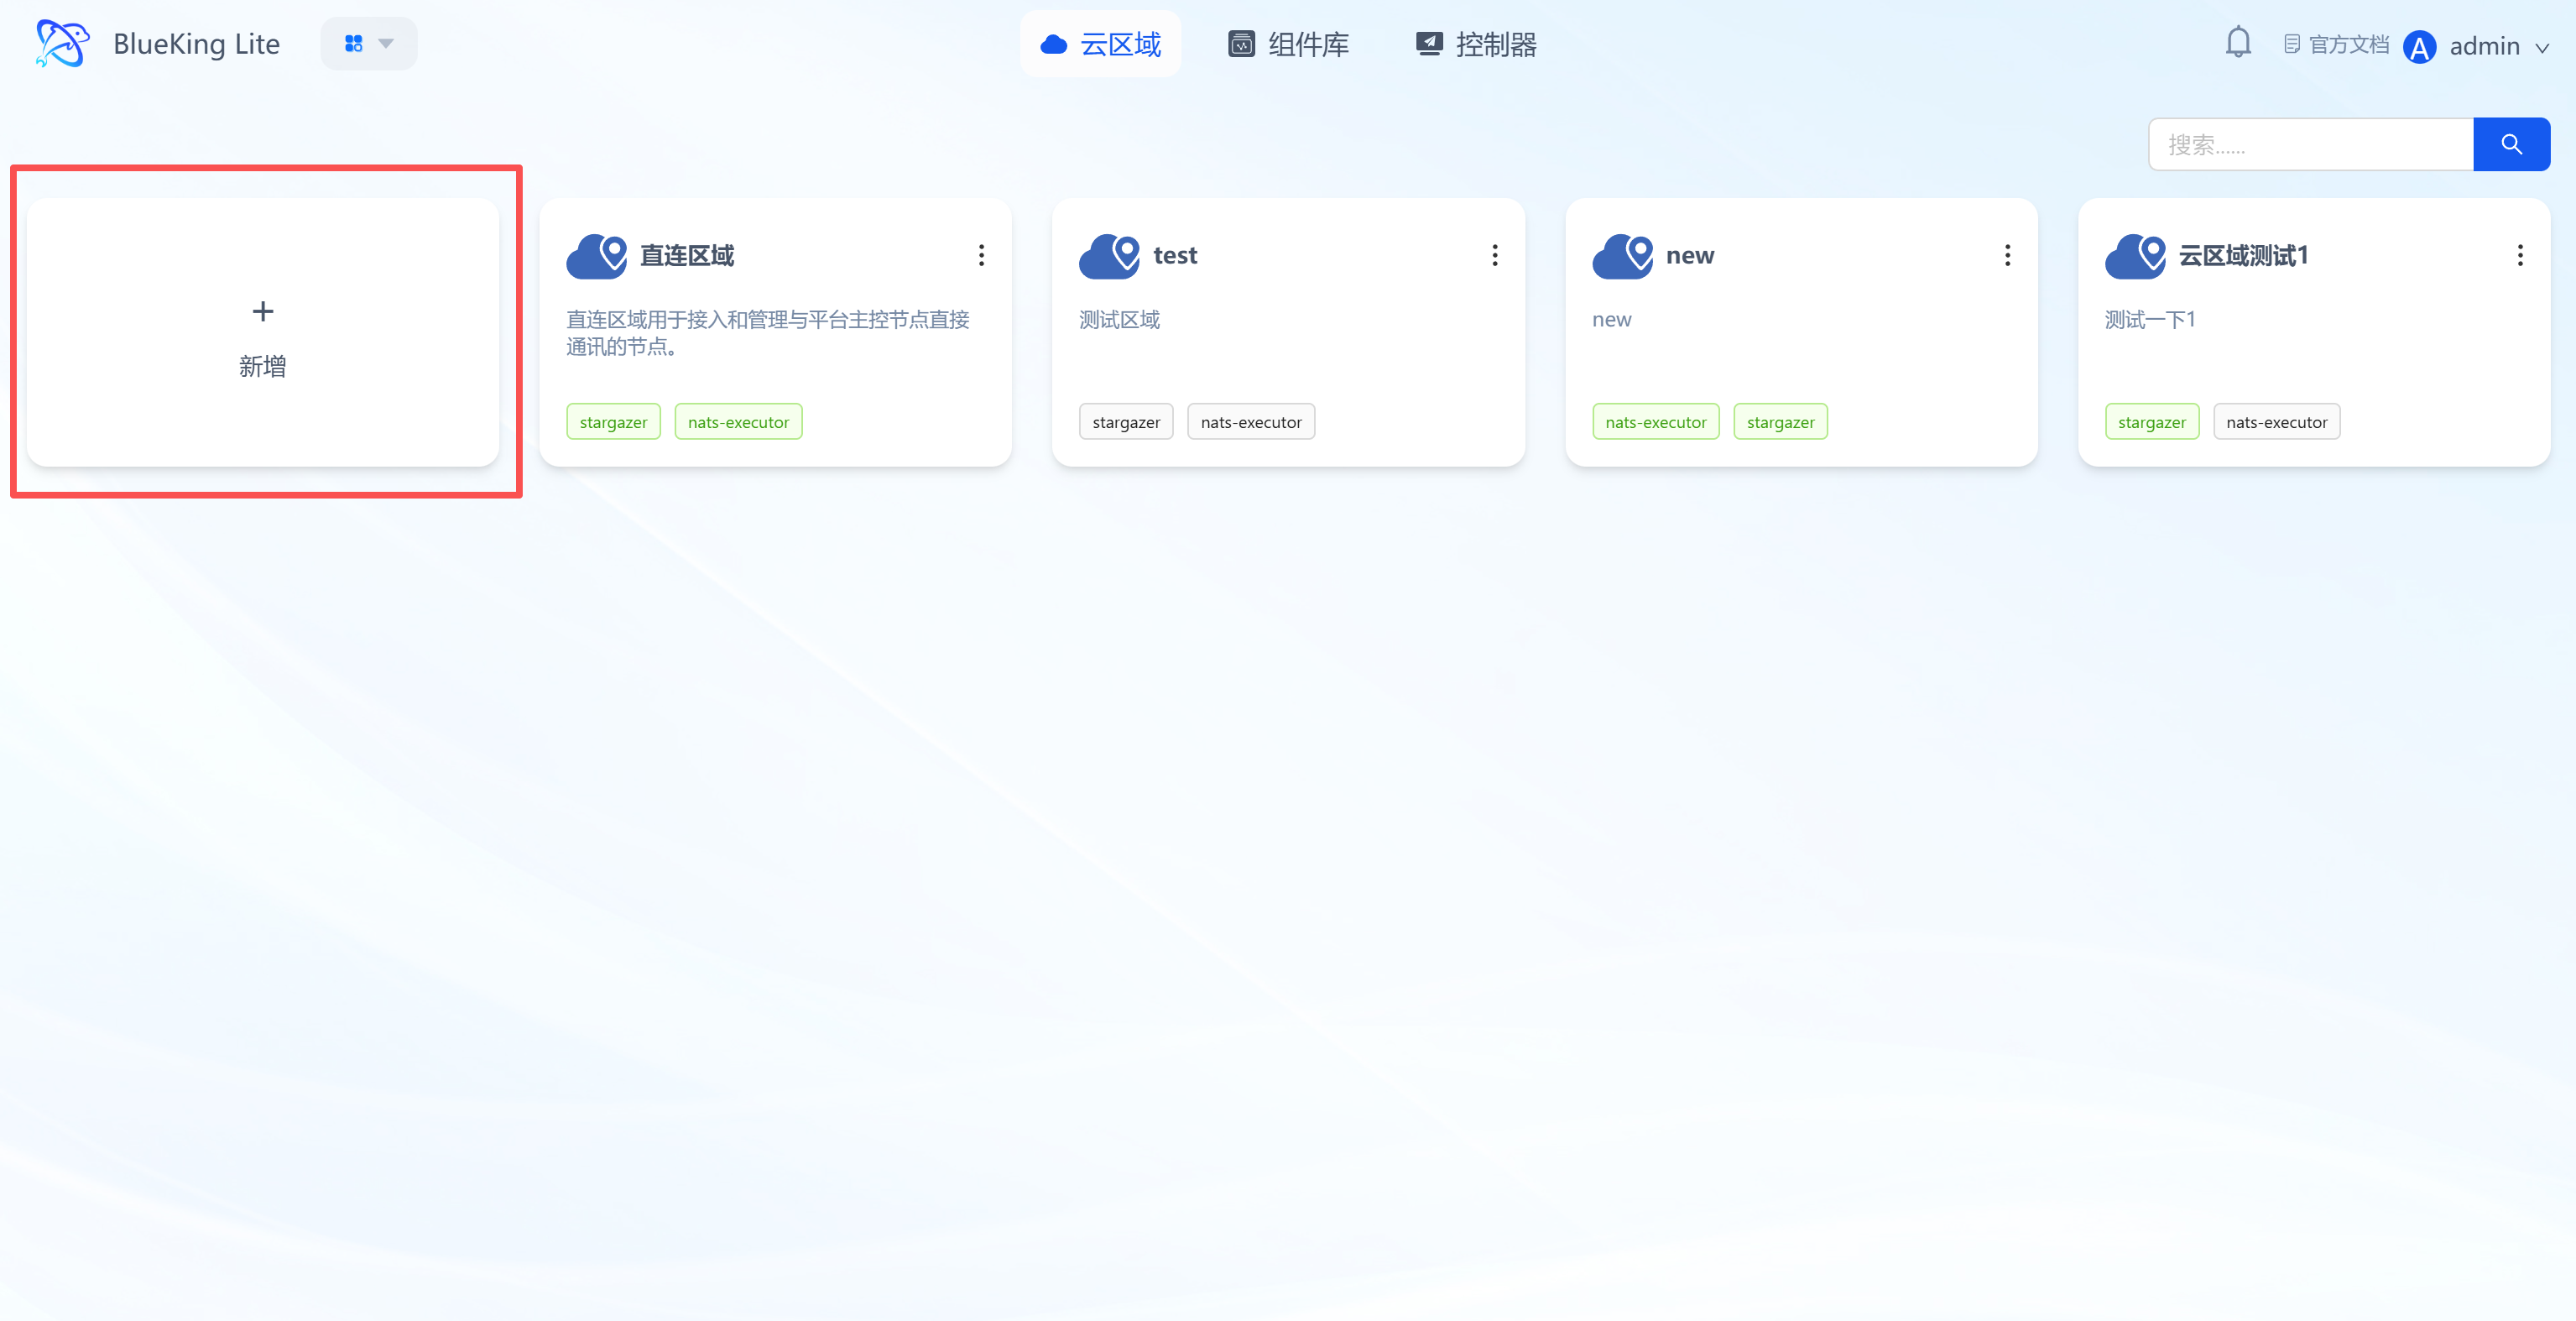
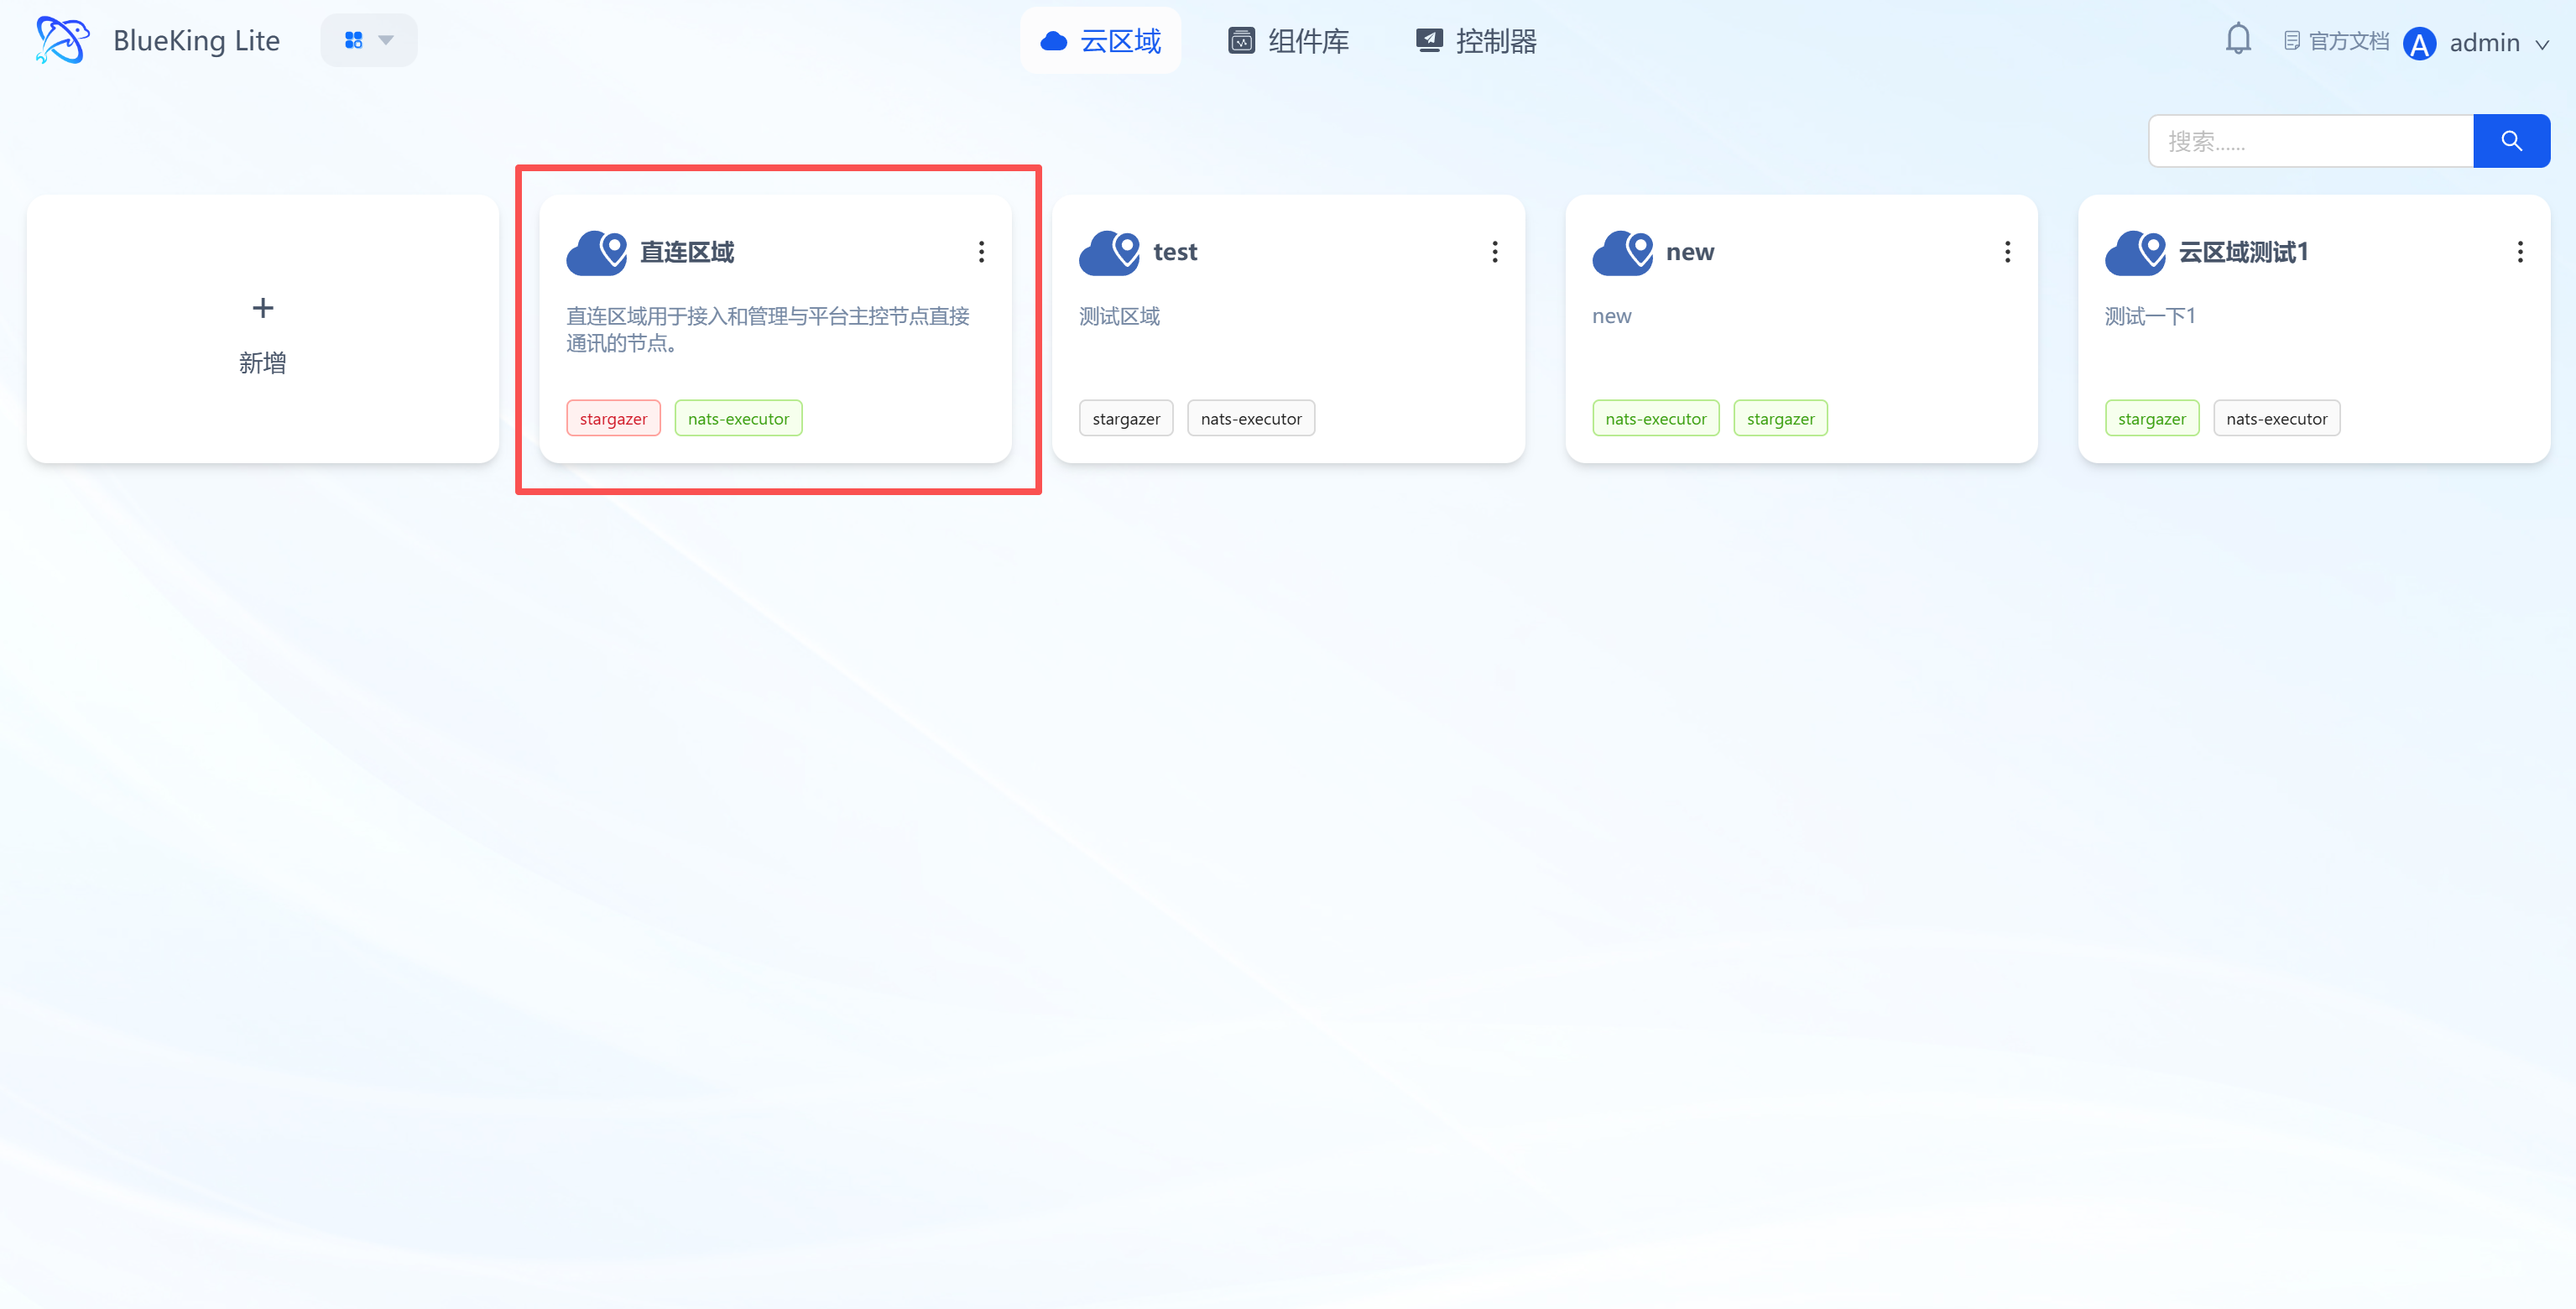
- After entering the Node module, you will land on the "Cloud Region" tab by default.
- Click the "New" button on the left side of the page to open the "New Cloud Region" configuration form.
UI Guide:
- Cloud region list: The right side displays already created cloud regions, with each region showing associated component information; the "New" button on the left is the entry point for creating new regions.
Step 3: Configure Cloud Region Information
The system simplifies cloud region configuration through a standardized form -- just fill in the key information to complete creation.
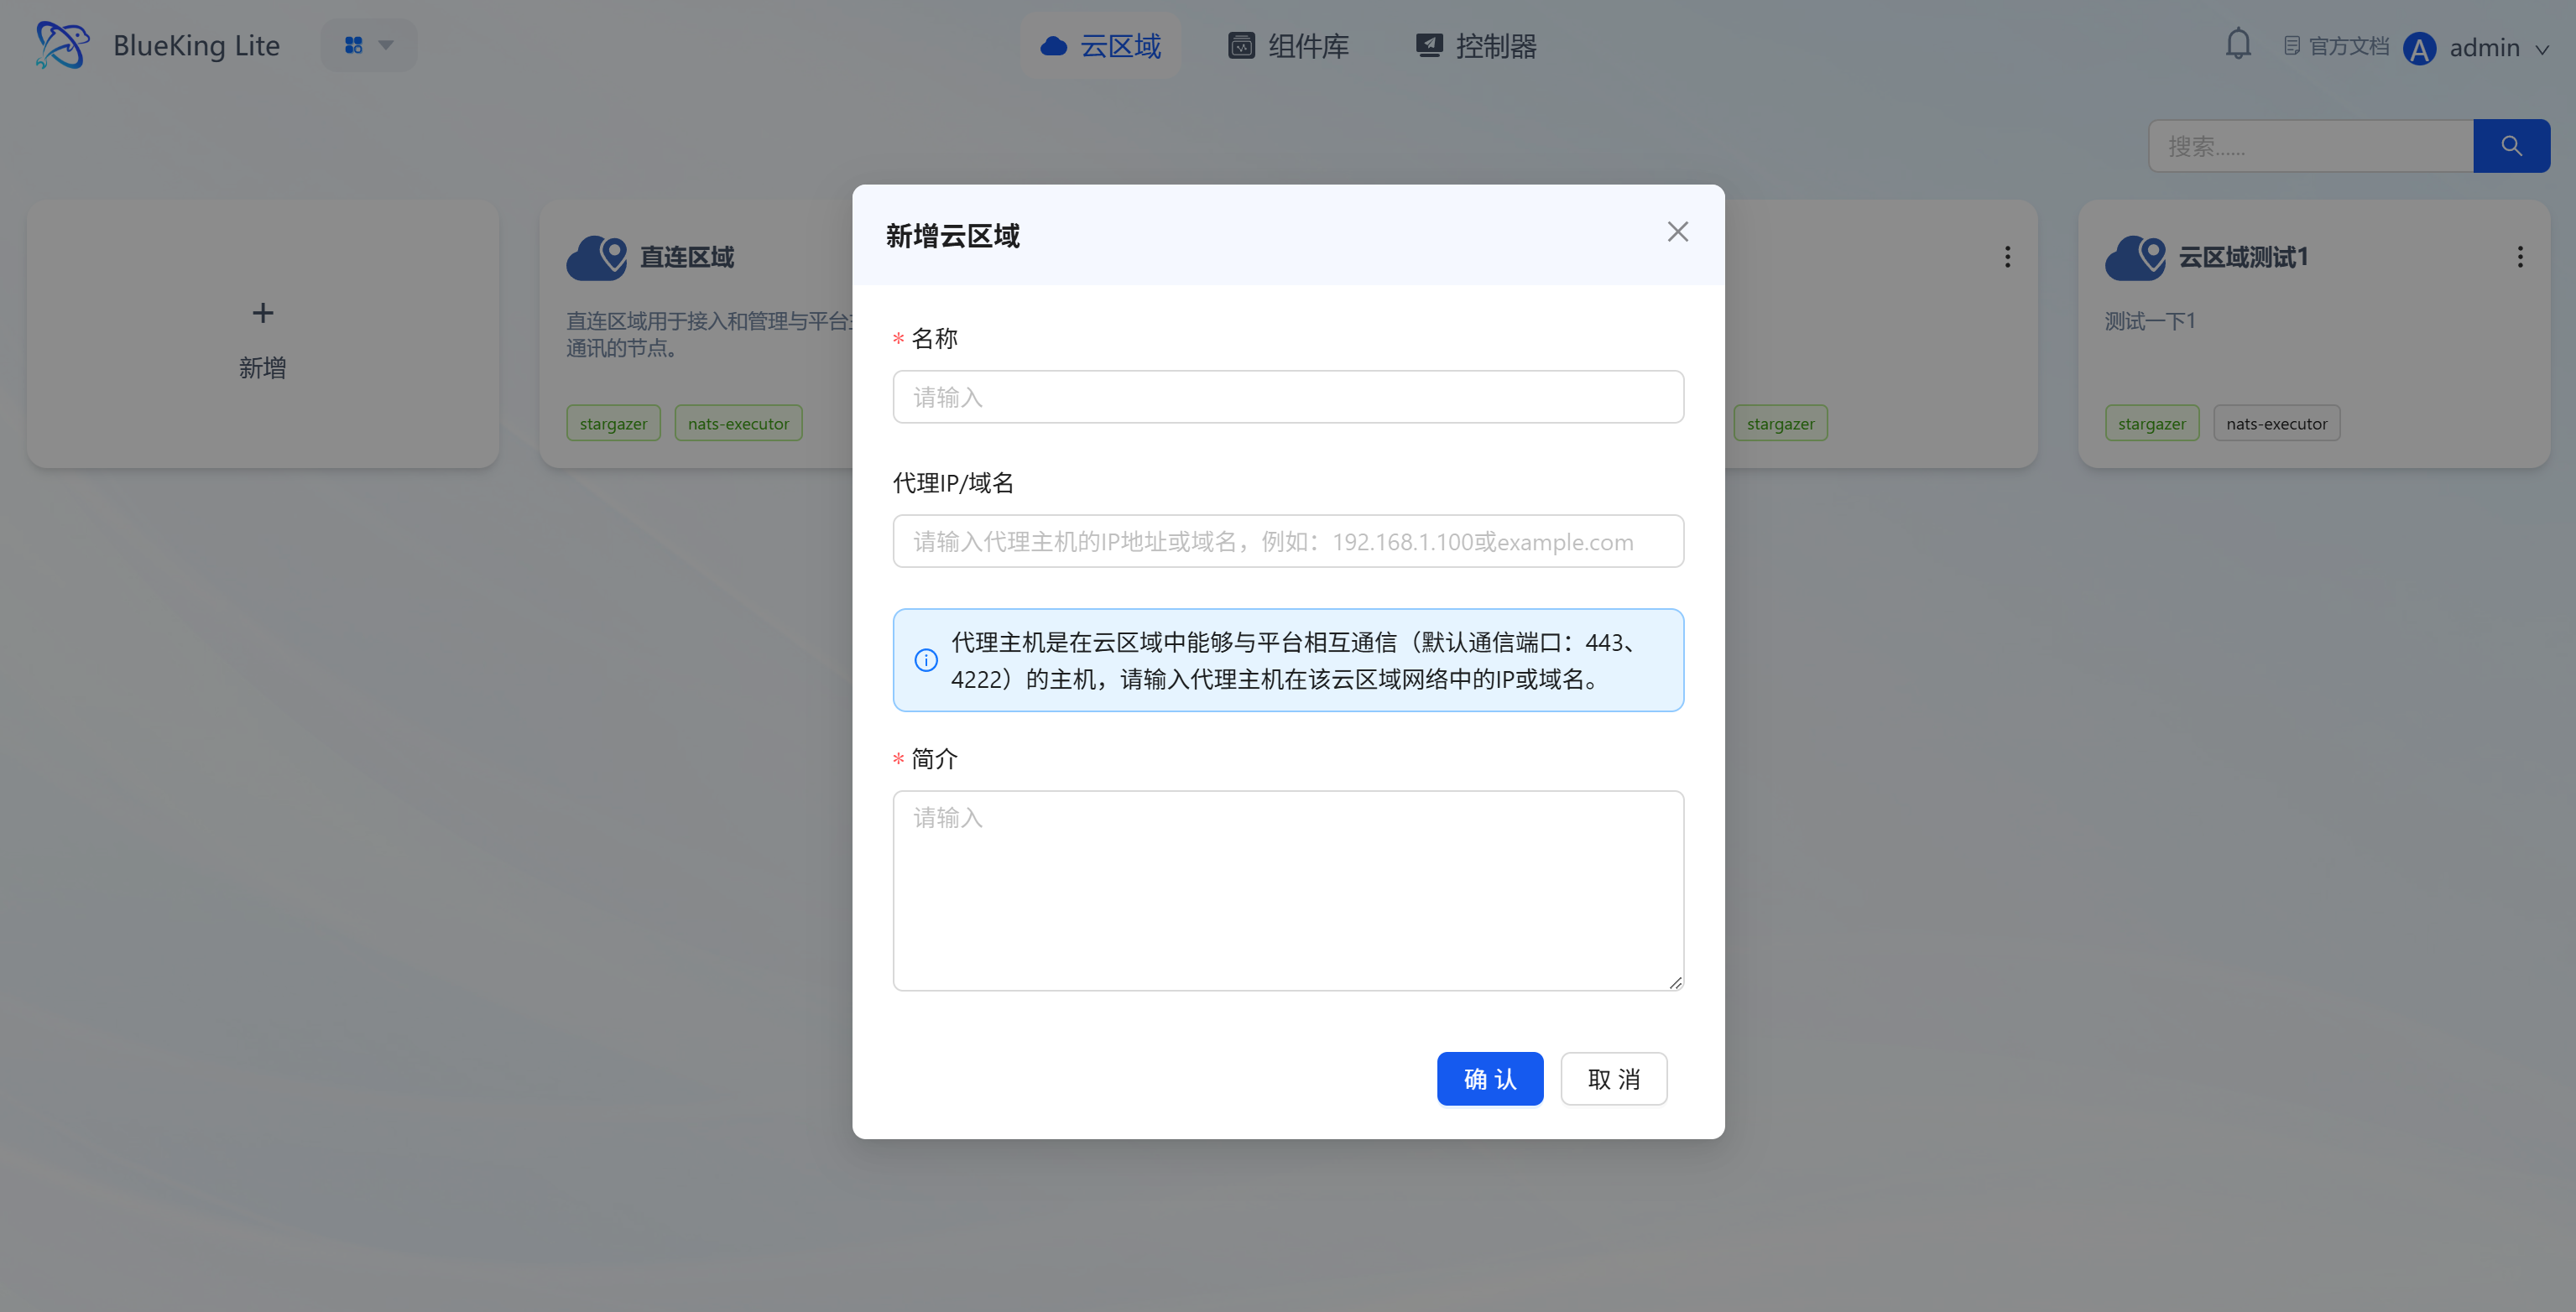
- In the "New Cloud Region" form, fill in the following information:
- Name: Enter an identifying name for the cloud region (e.g., "Production Environment Region");
- Proxy IP/Domain: Enter the proxy host IP or domain that connects the cloud region to the platform;
- Description: Add descriptive information about the cloud region (optional);
- Click the "Confirm" button at the bottom of the form to complete the cloud region creation.
UI Guide:
- Form field notes: The "Proxy IP/Domain" is the critical configuration for communication between the cloud region and the platform. Enter the host address within the region that can connect to the platform.
Step 4: Configure Cloud Region Environment
The cloud region environment is the core component set supporting communication between the region and the platform (e.g., stargazer, nats-executor). This configuration must be completed to ensure subsequent node connectivity.
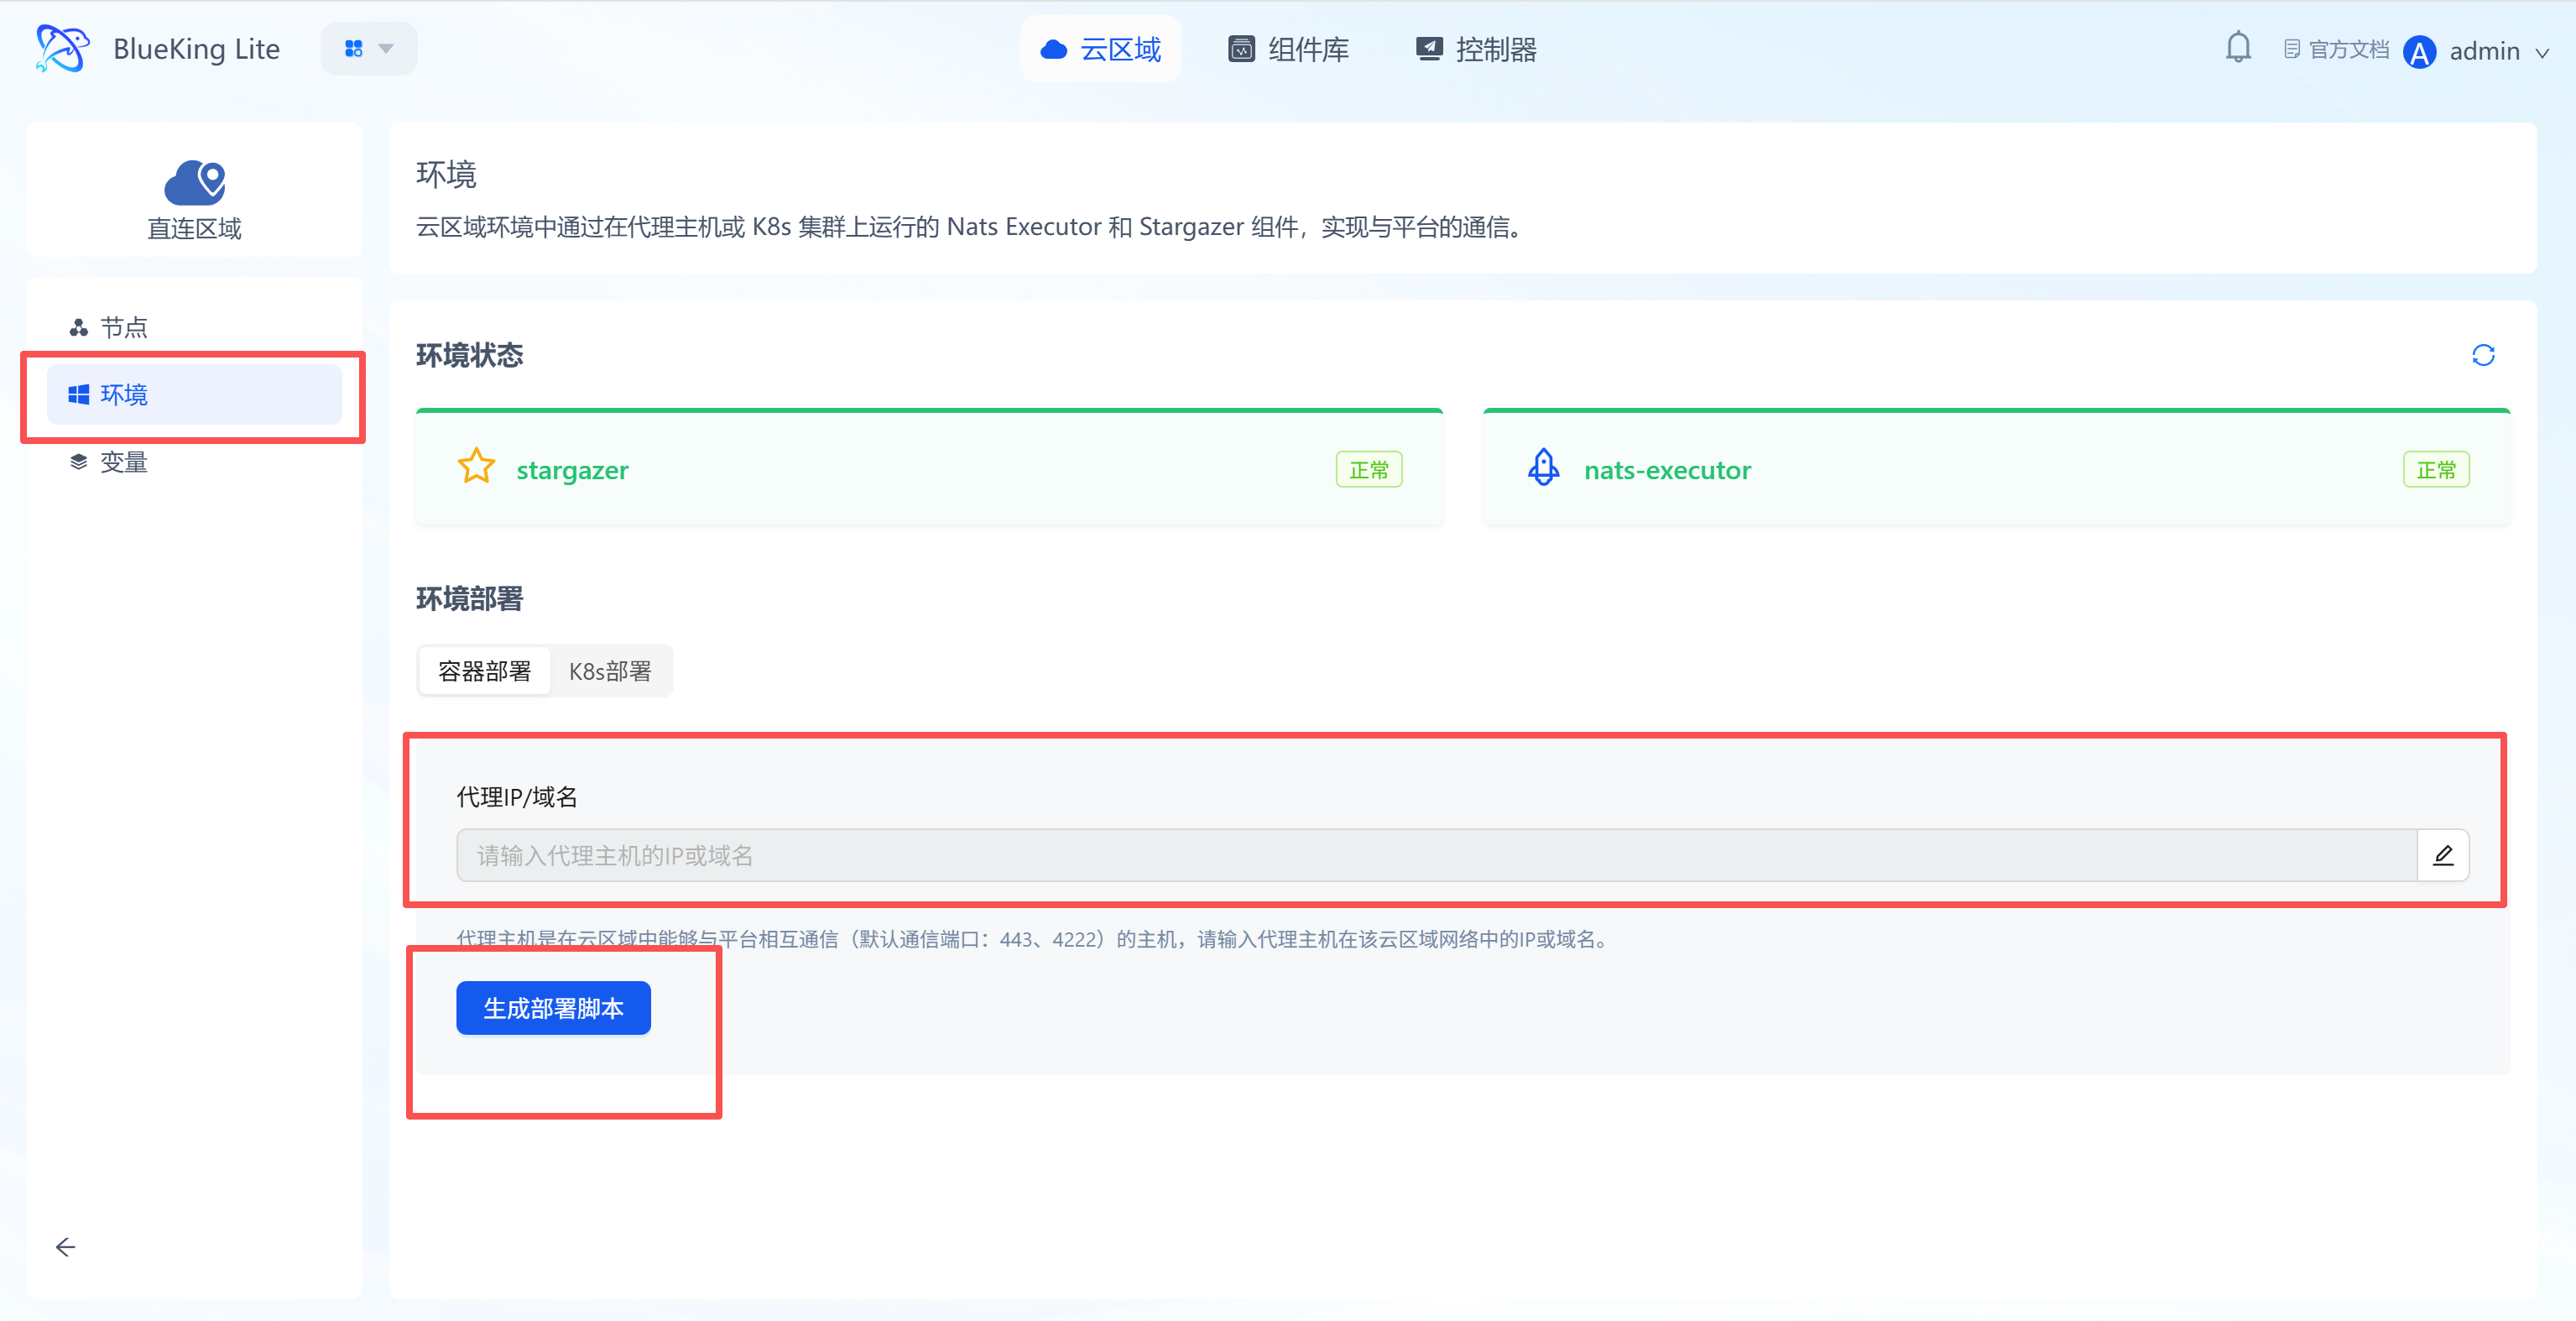
- Enter the target cloud region's sub-page (e.g., the newly created "Production Environment Region"), and click "Environment" in the left sidebar to enter the environment configuration page;
- In the "Environment Deployment" module's "Proxy IP/Domain" input field, enter the proxy host IP/domain within the cloud region that can communicate with the platform (must match the proxy information provided during cloud region creation);
- Click the "Generate Deployment Script" button, and the system will generate a deployment script adapted to the current environment;
- Copy the script and execute it on the proxy host to complete the deployment of the
stargazerandnats-executorcomponents; - After deployment, check the component status in the "Environment Status" module (displaying "Normal" indicates successful configuration).
UI Guide:
- Environment status area: Real-time display of the runtime status of communication components (
stargazer/nats-executor);- Deployment configuration area: Currently supports container deployment for generating scripts and completing environment setup. The K8s entry is for subsequent upgrade guidance and does not directly generate K8s deployment scripts on this page.
Node Management
Install Node Controller
Controllers are the core management components for nodes. You must install a controller on target nodes to enable subsequent component deployment.
Step 1: Navigate to the Target Cloud Region's Node Page
After cloud region creation is complete, navigate to the corresponding region's node page to manage specific nodes.
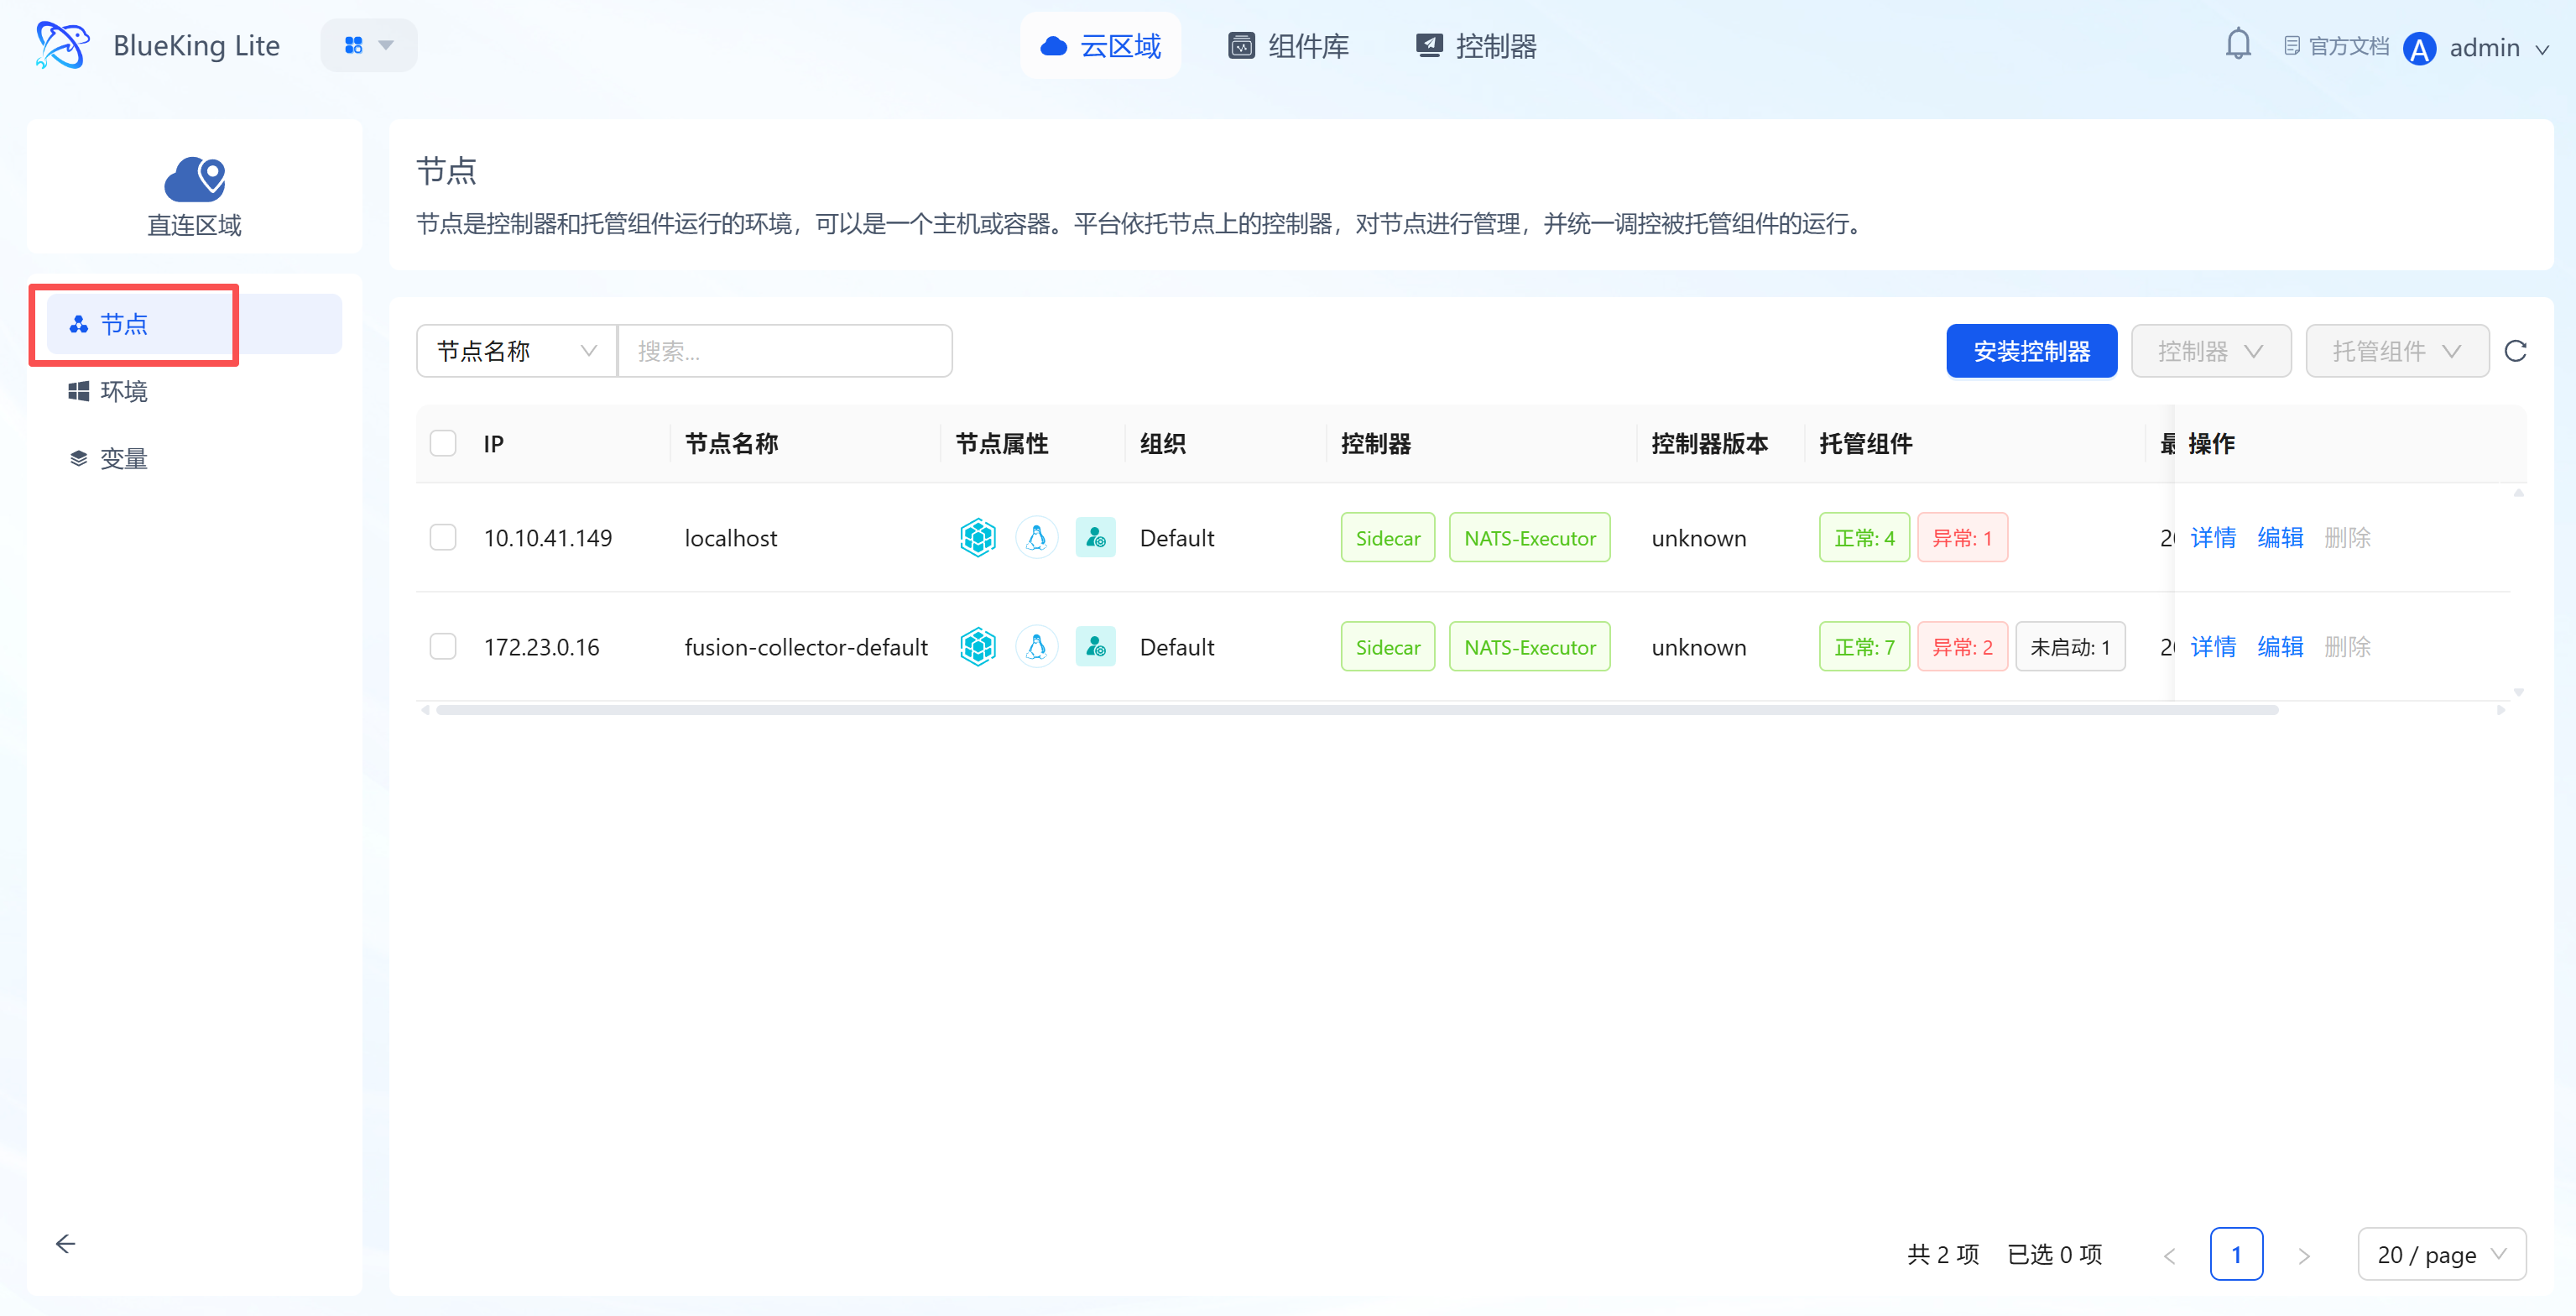
- In the cloud region list, click the target cloud region (e.g., "Direct Connect Region") to enter that region's sub-page.
- In the left sidebar, click "Nodes" to enter the node management page.
UI Guide:
- Sidebar navigation: The cloud region sub-page sidebar contains features such as "Nodes, Environment, Variables." "Nodes" is the entry point for managing server nodes.
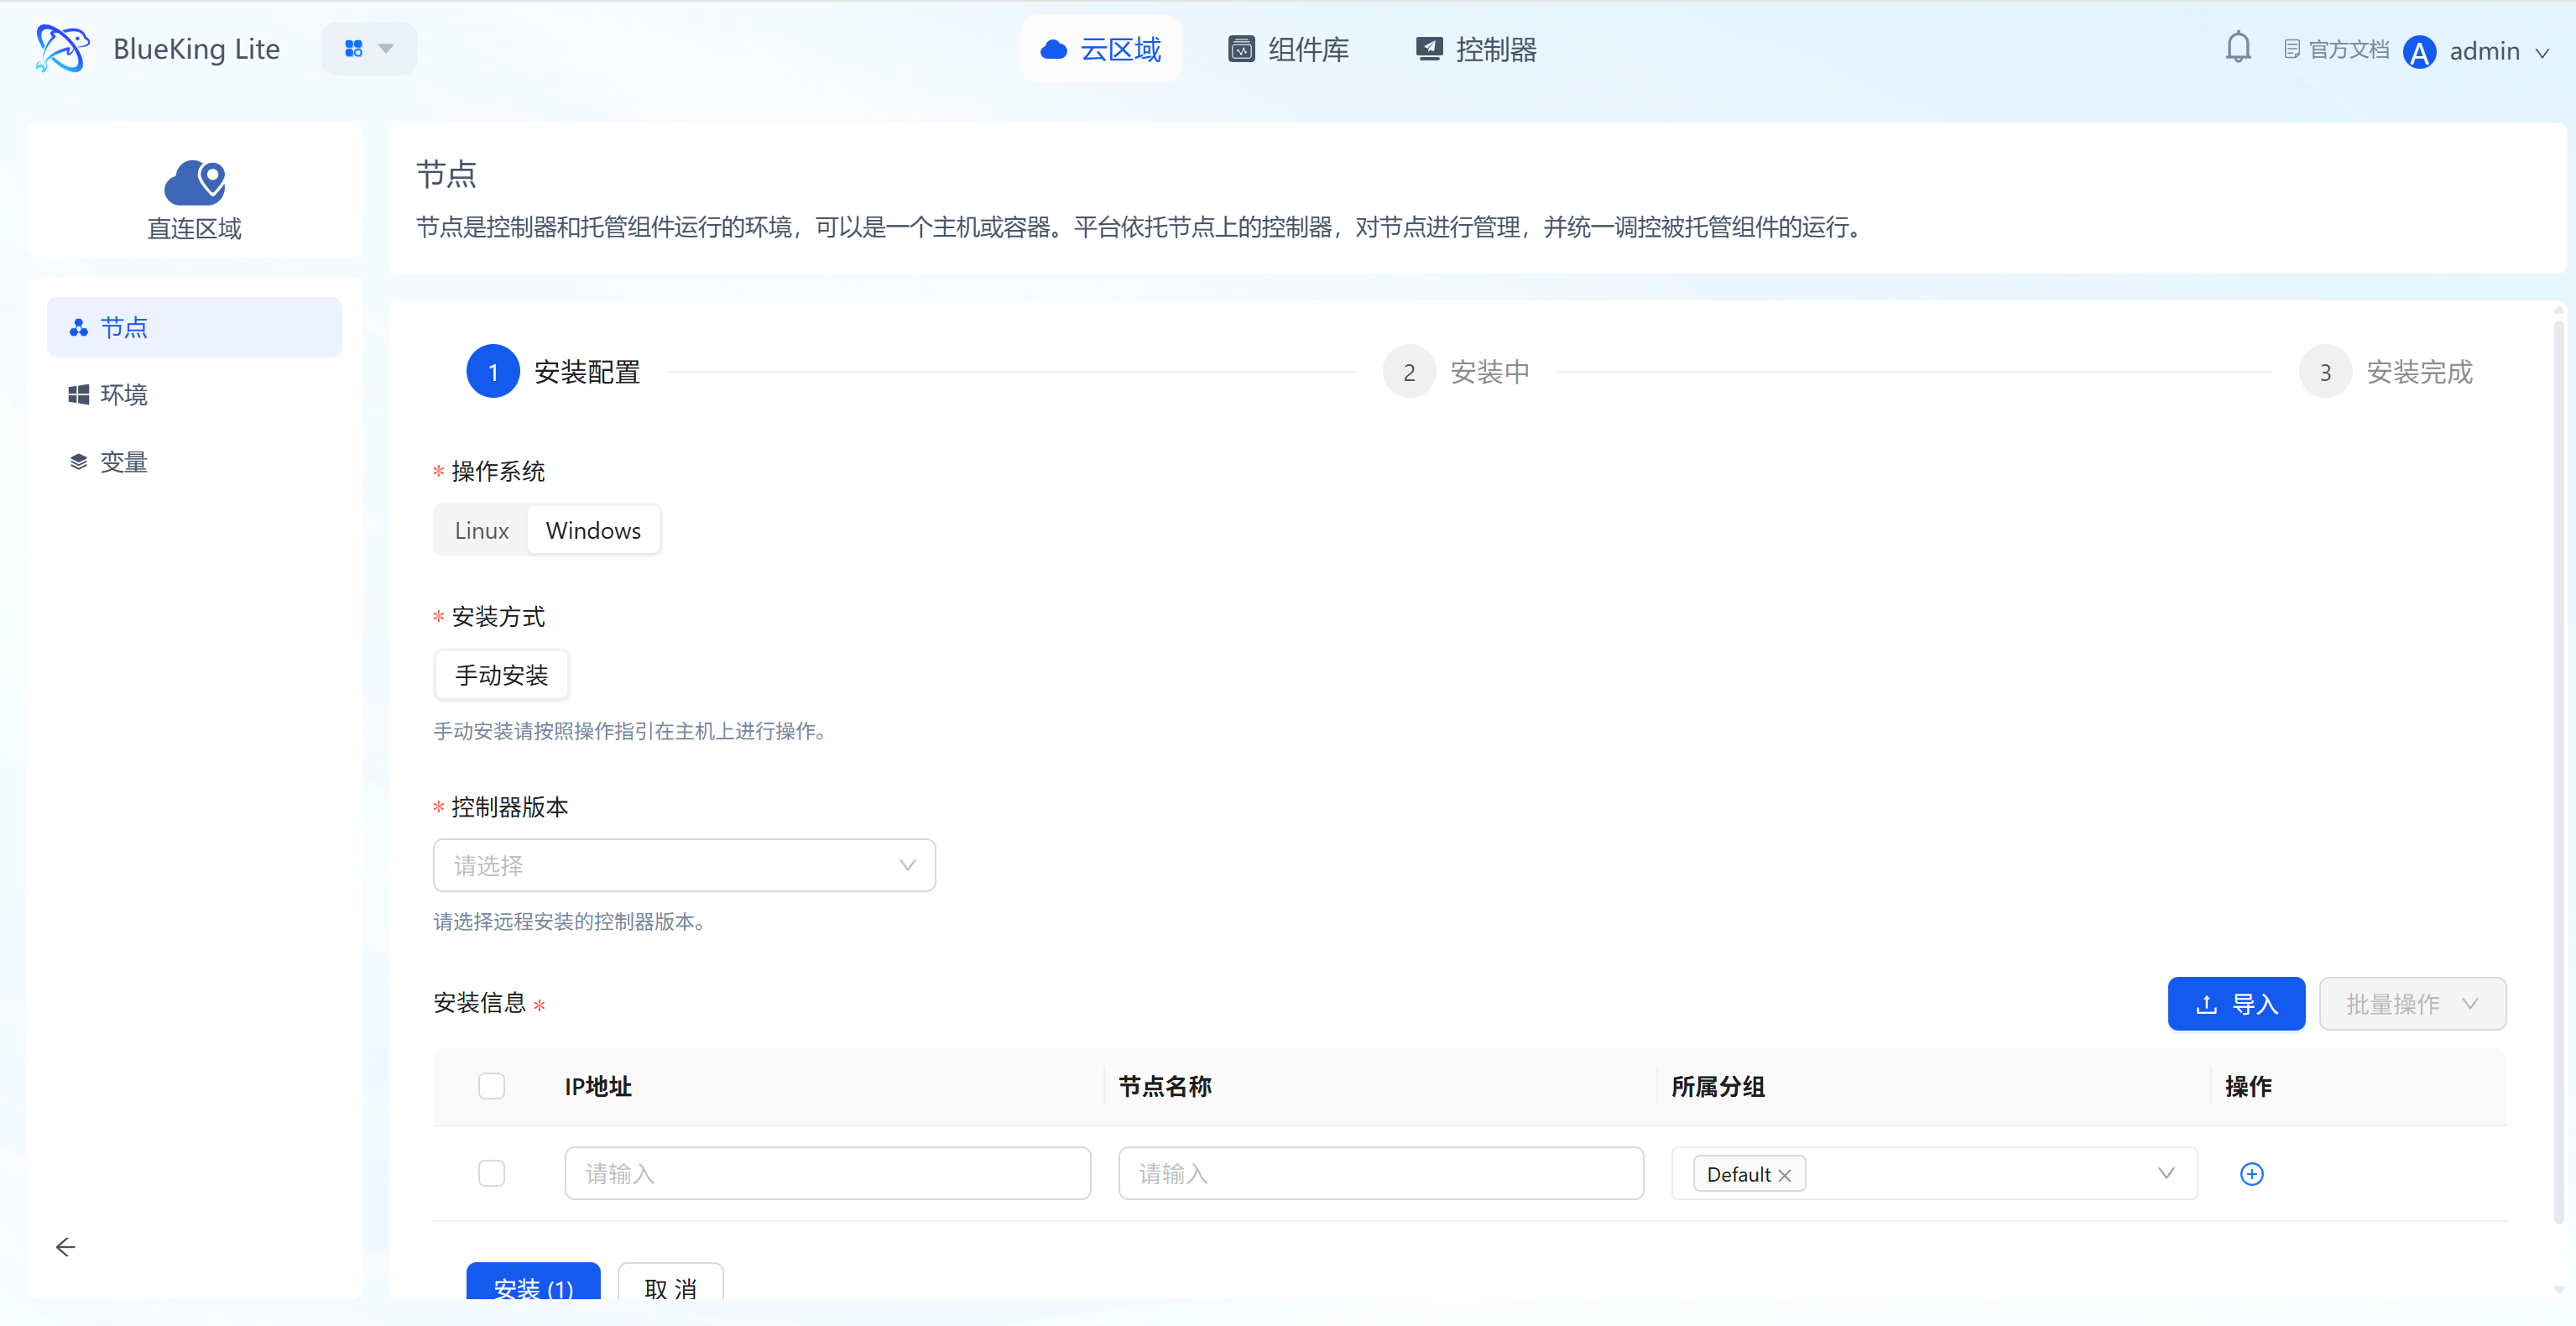
Step 2: Initiate Controller Installation
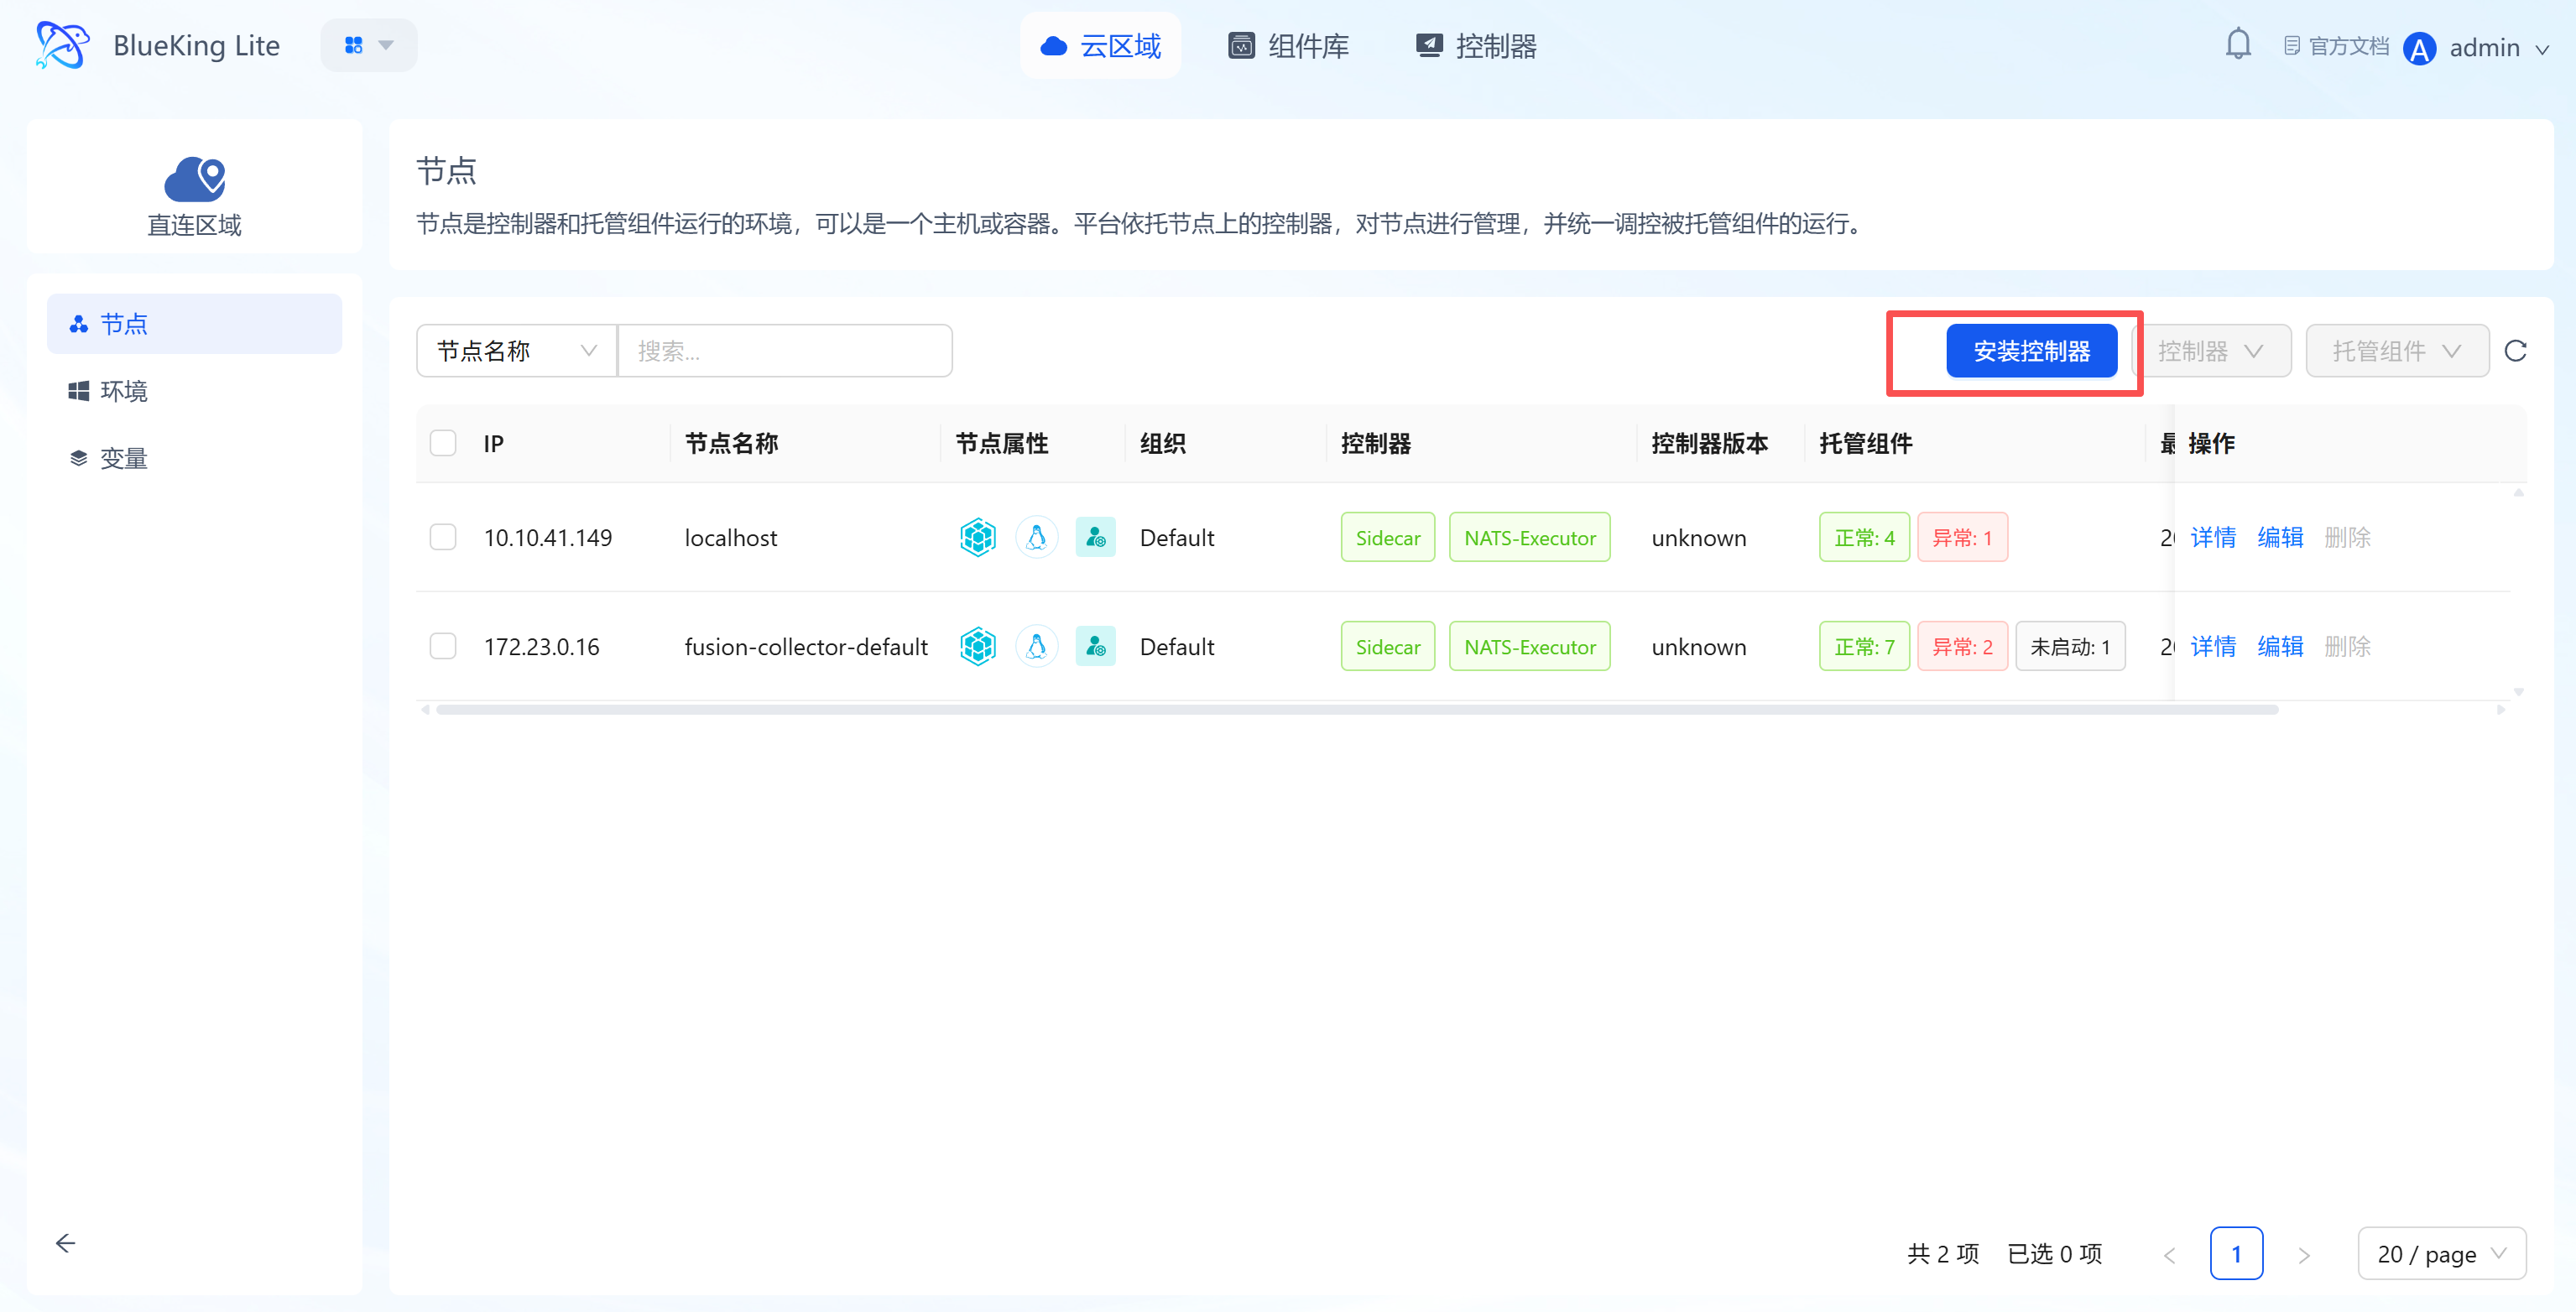
The node page provides an "Install Controller" feature that supports batch deployment of management components to nodes.
- In the top-right corner of the node page, click the "Install Controller" button to open the installation configuration panel.
- Select the "Operating System" corresponding to the node (Linux/Windows).
UI Guide:
- Node list area: Displays information about managed nodes, including IP and controller status; the "Install Controller" button is the core entry point for deploying management components.
Step 3: Configure Installation Method and Information
The system supports two installation methods -- remote and manual -- to accommodate different operations scenarios.
- Select the "Installation Method":
- Remote installation: Fill in the node's IP, login account, password, or SSH key, and other information. The system automatically detects the target node's CPU architecture (x86_64 / ARM64) and distributes the matching installer and controller package. No manual architecture selection is required.
- Manual installation: Follow the on-page instructions to copy the install command and execute it on the node host. The local system automatically detects architecture and downloads the matching version;
- Select the "Controller Version" (as the version anchor point) and complete the corresponding installation information (only required for remote installation);
- If installation task fails, you can view the step-by-step execution status in the installation progress panel and retry failed nodes.
UI Guide:
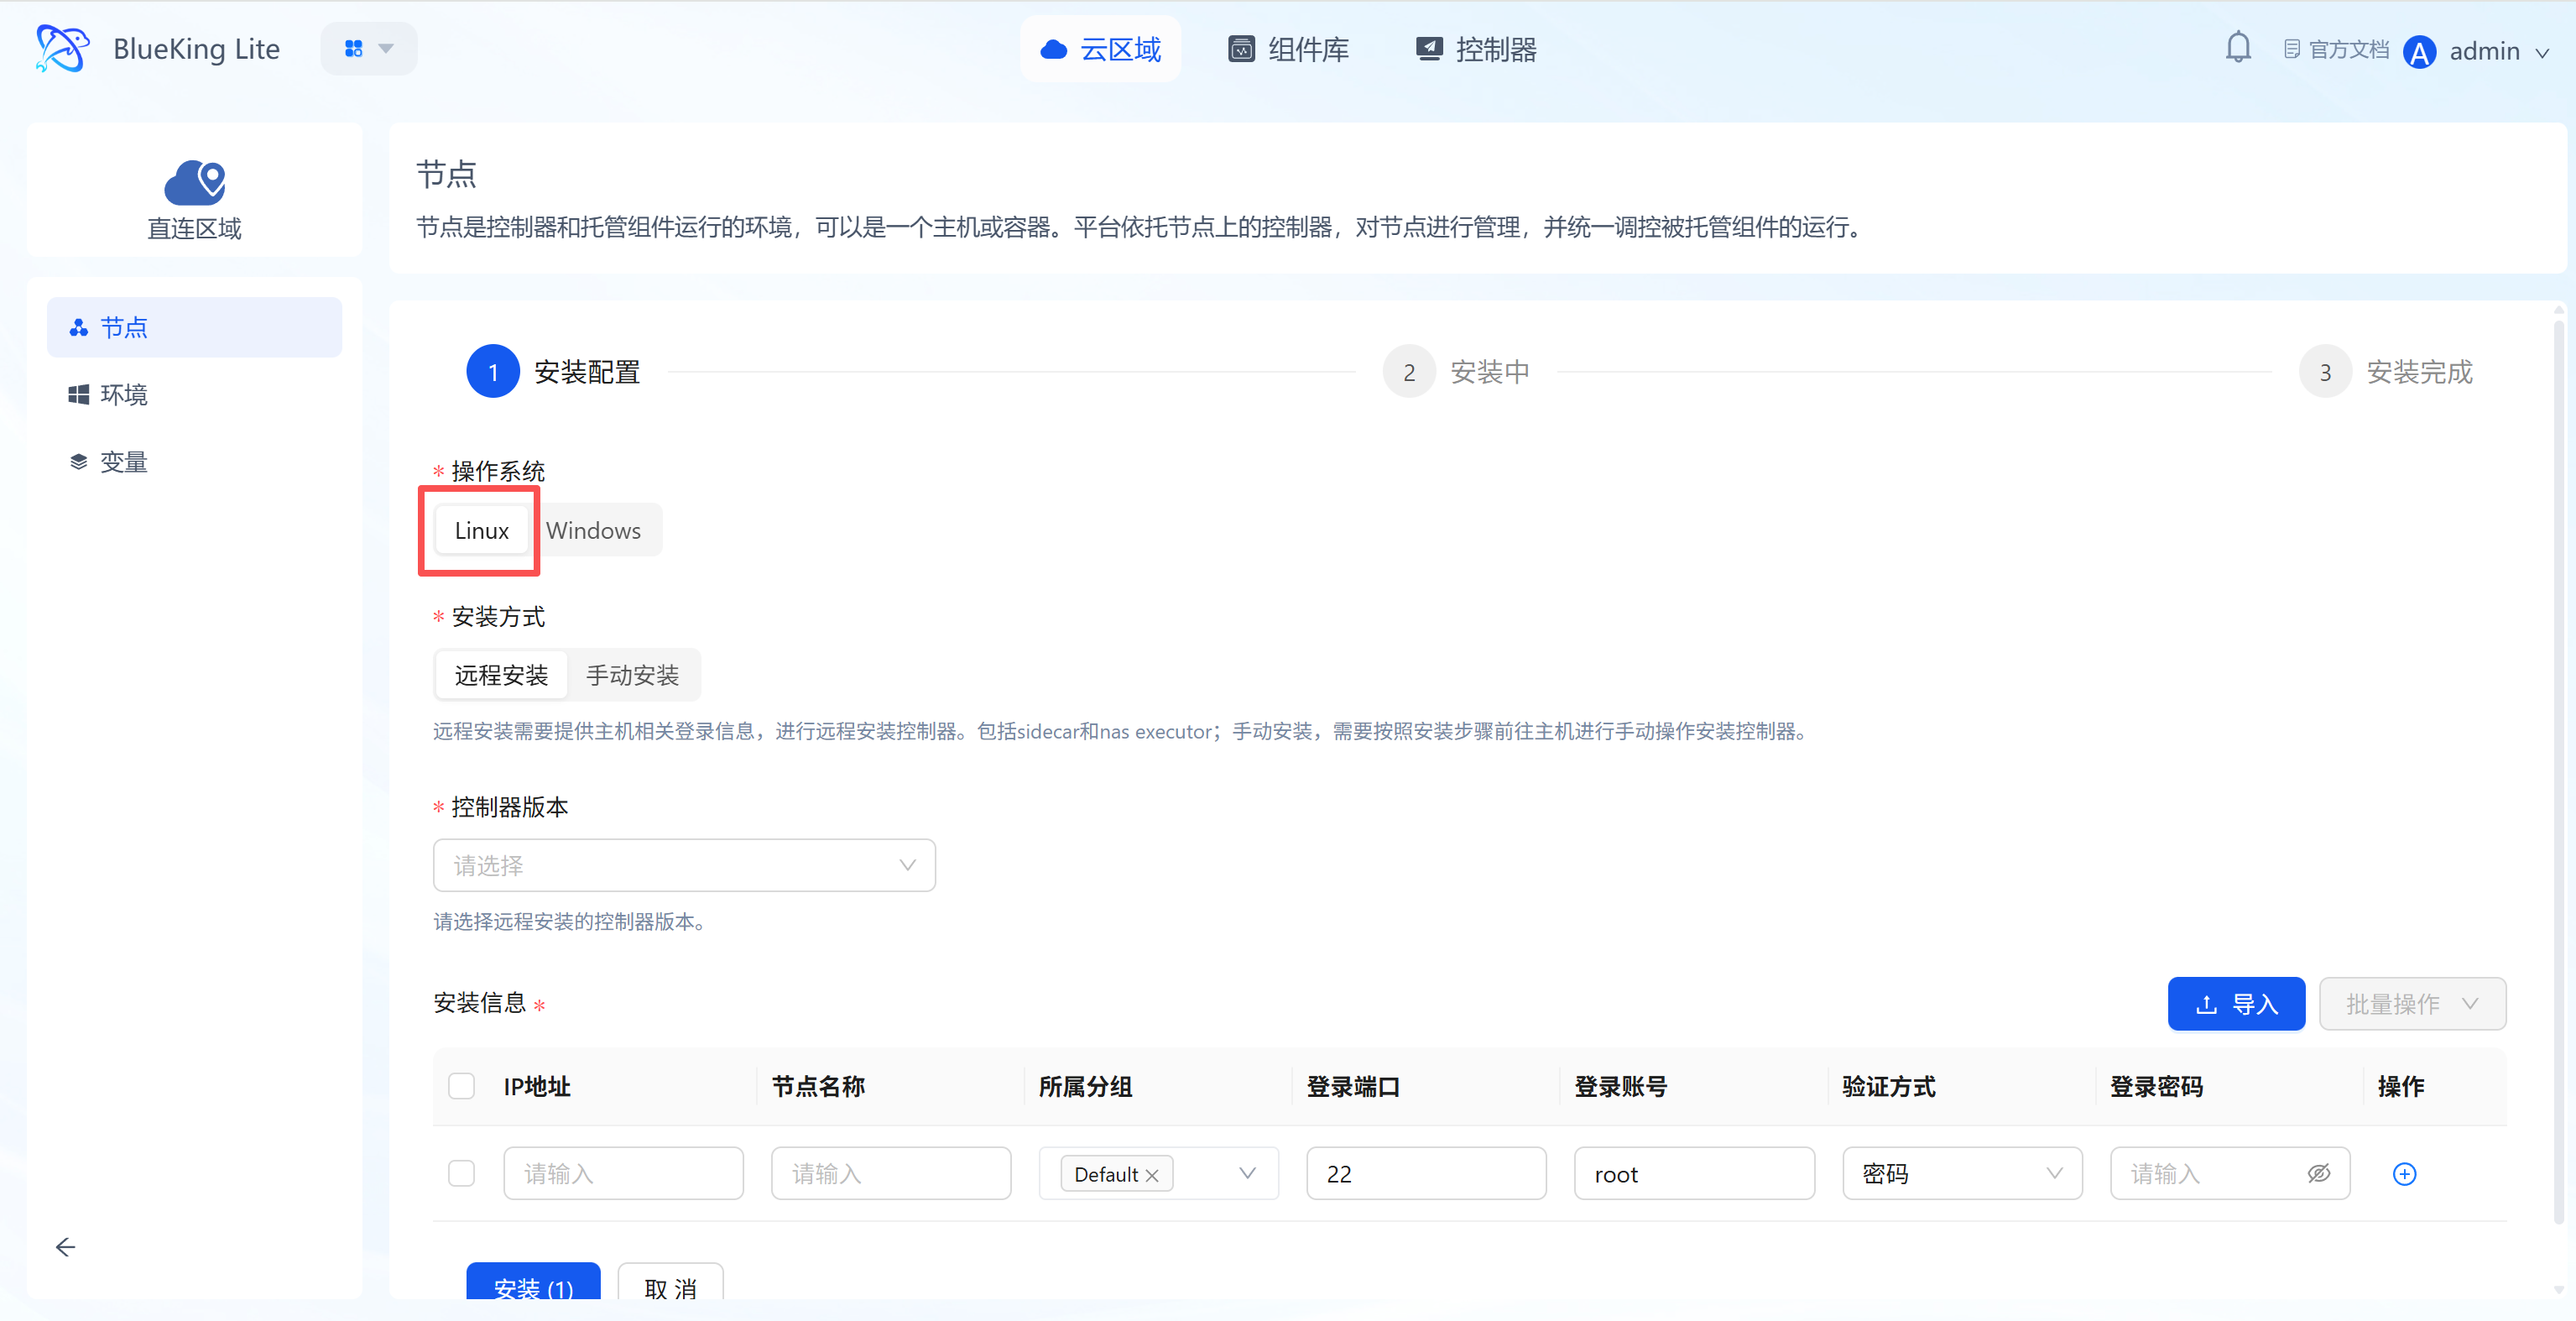
- Installation method toggle: Choose the installation method based on the node's network reachability. Remote installation enables batch automated deployment with automatic CPU architecture detection and matching.
Step 4: Complete Controller Installation
After configuration is complete, submit the task to finish controller deployment.
- After confirming the installation configuration is correct, click the "Install" button at the bottom of the panel.
- Wait for the installation progress to complete. You can check the controller's runtime status in the node list.
Hosted Component Deployment
Install Monitoring Components
After controller installation is complete, you can deploy agents, collectors, and other business components through the hosted component feature.
Step 1: Select Target Nodes
First select the nodes where you want to deploy components, then initiate the component installation task.
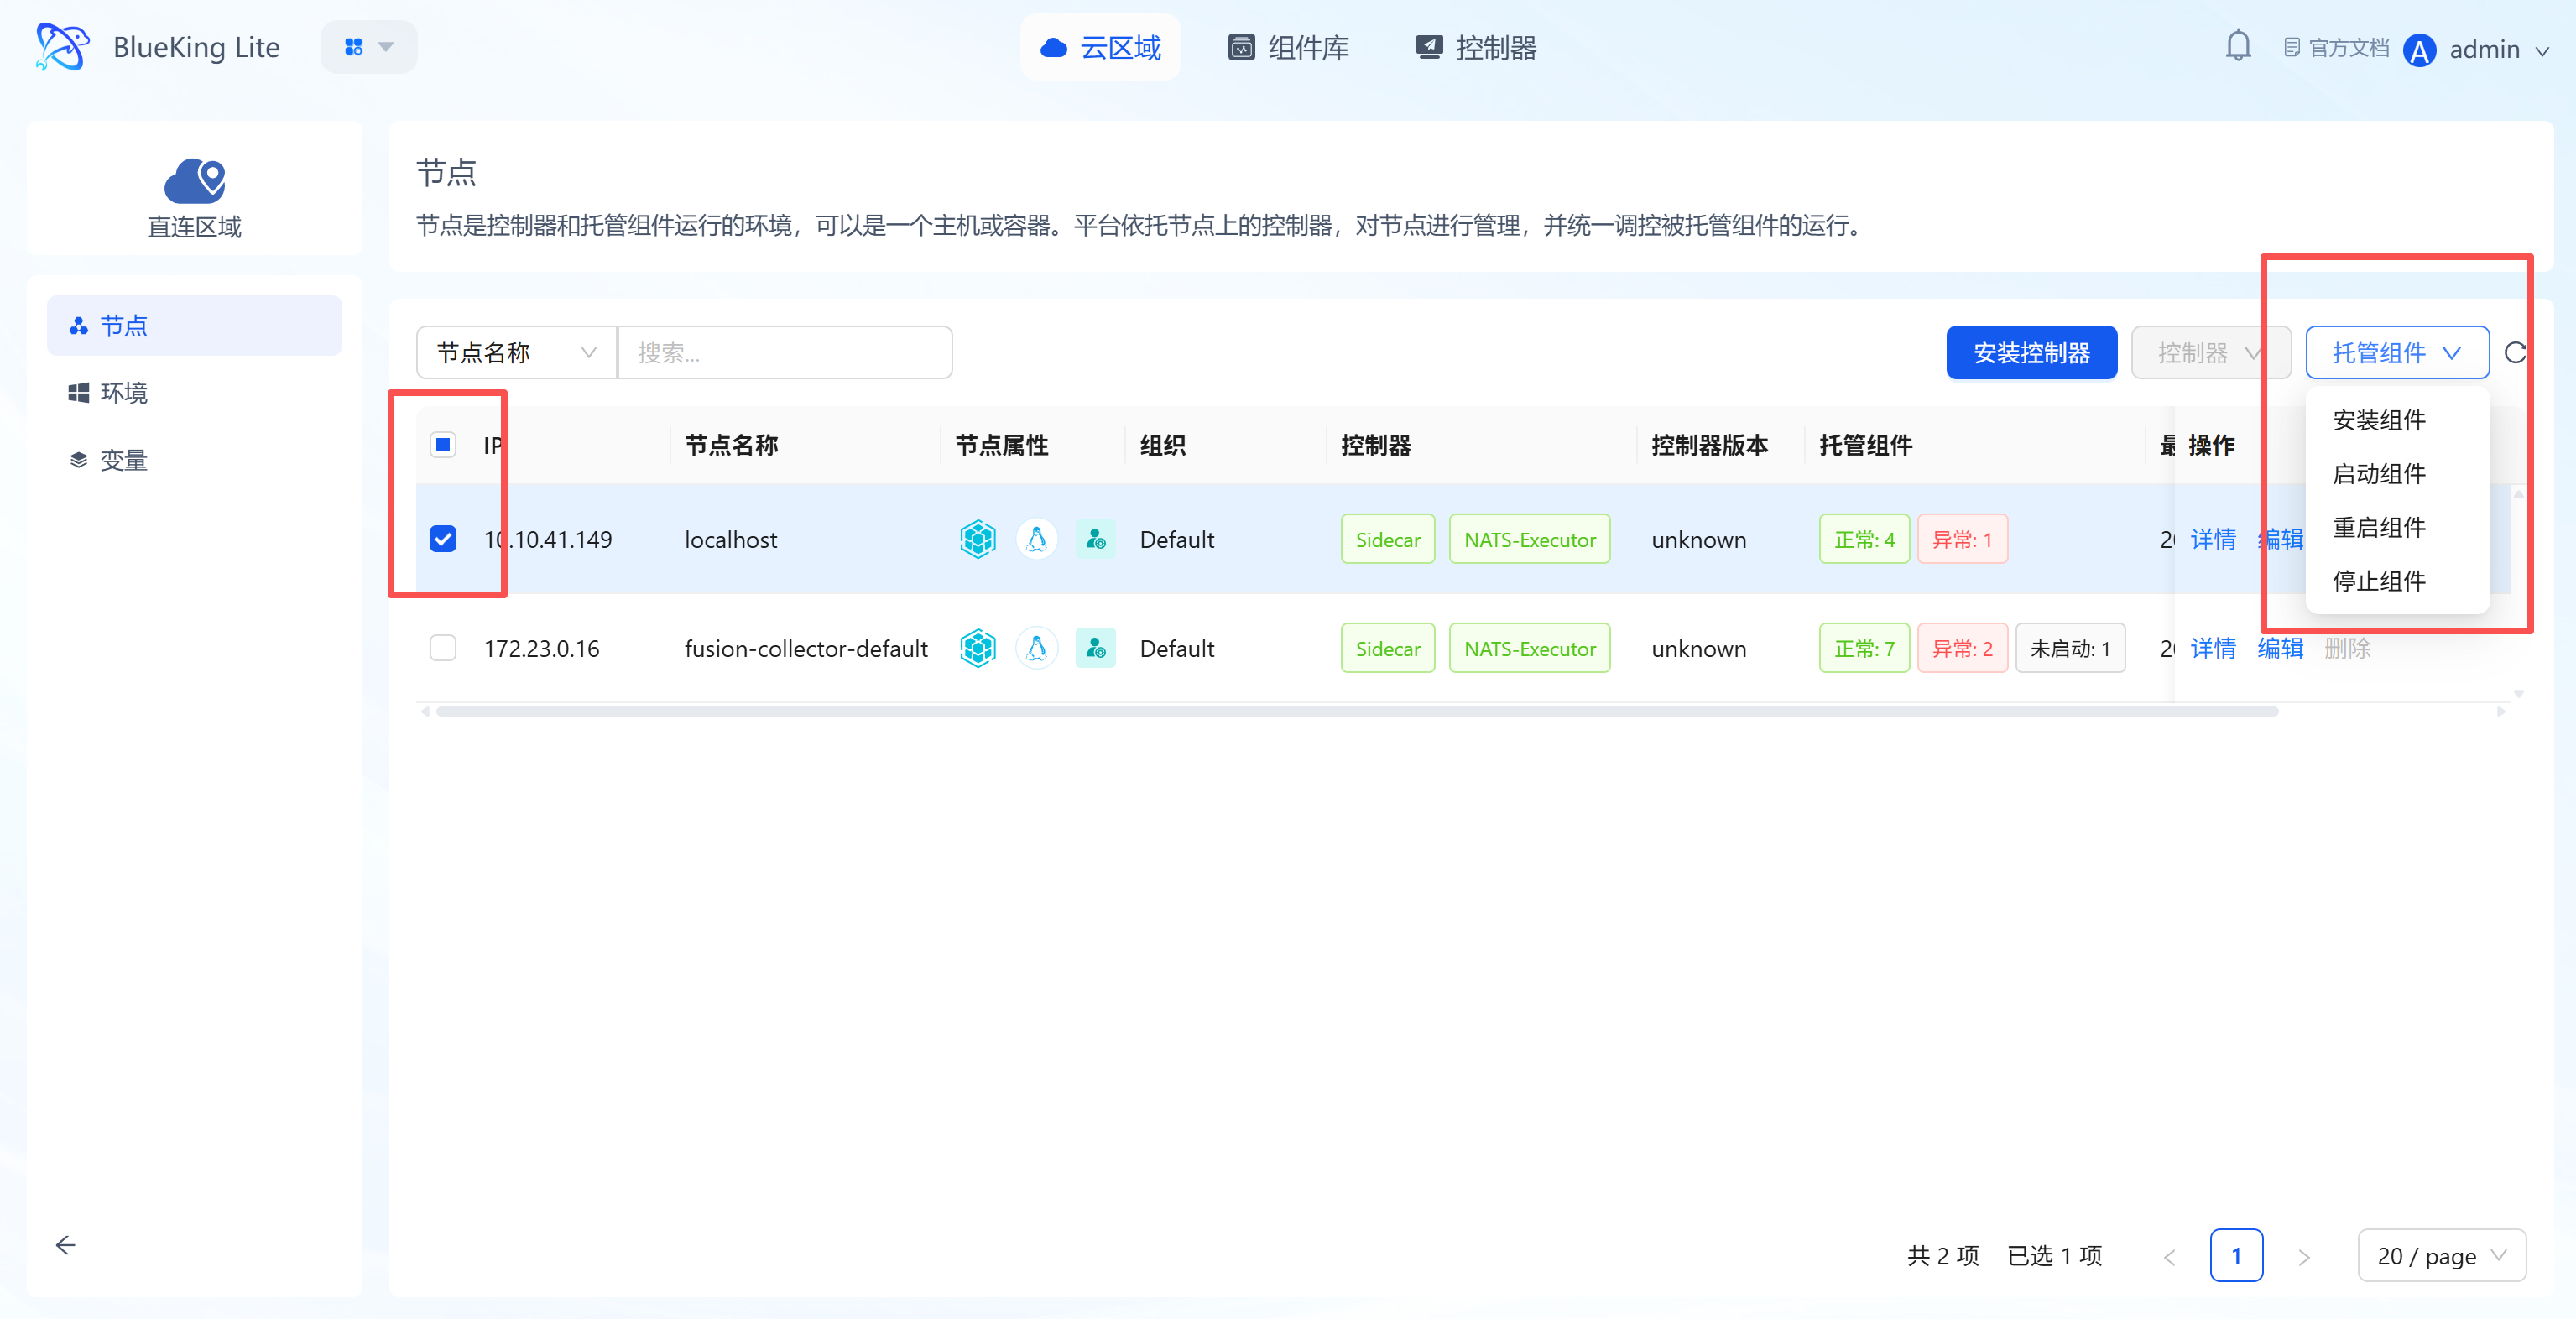
- In the node list, check the target nodes where you want to deploy components.
- Click the "Hosted Components" dropdown menu in the top-right corner of the page, and select "Install Component".
Warning / Security Best Practice: Before batch installing or running components, ensure the selected nodes have consistent operating system and CPU architecture. Otherwise, the system will block the batch operation.
UI Guide:
- Hosted components menu: Contains full lifecycle operations for components including "Install, Start, Restart, Stop," supporting batch management of components on nodes.
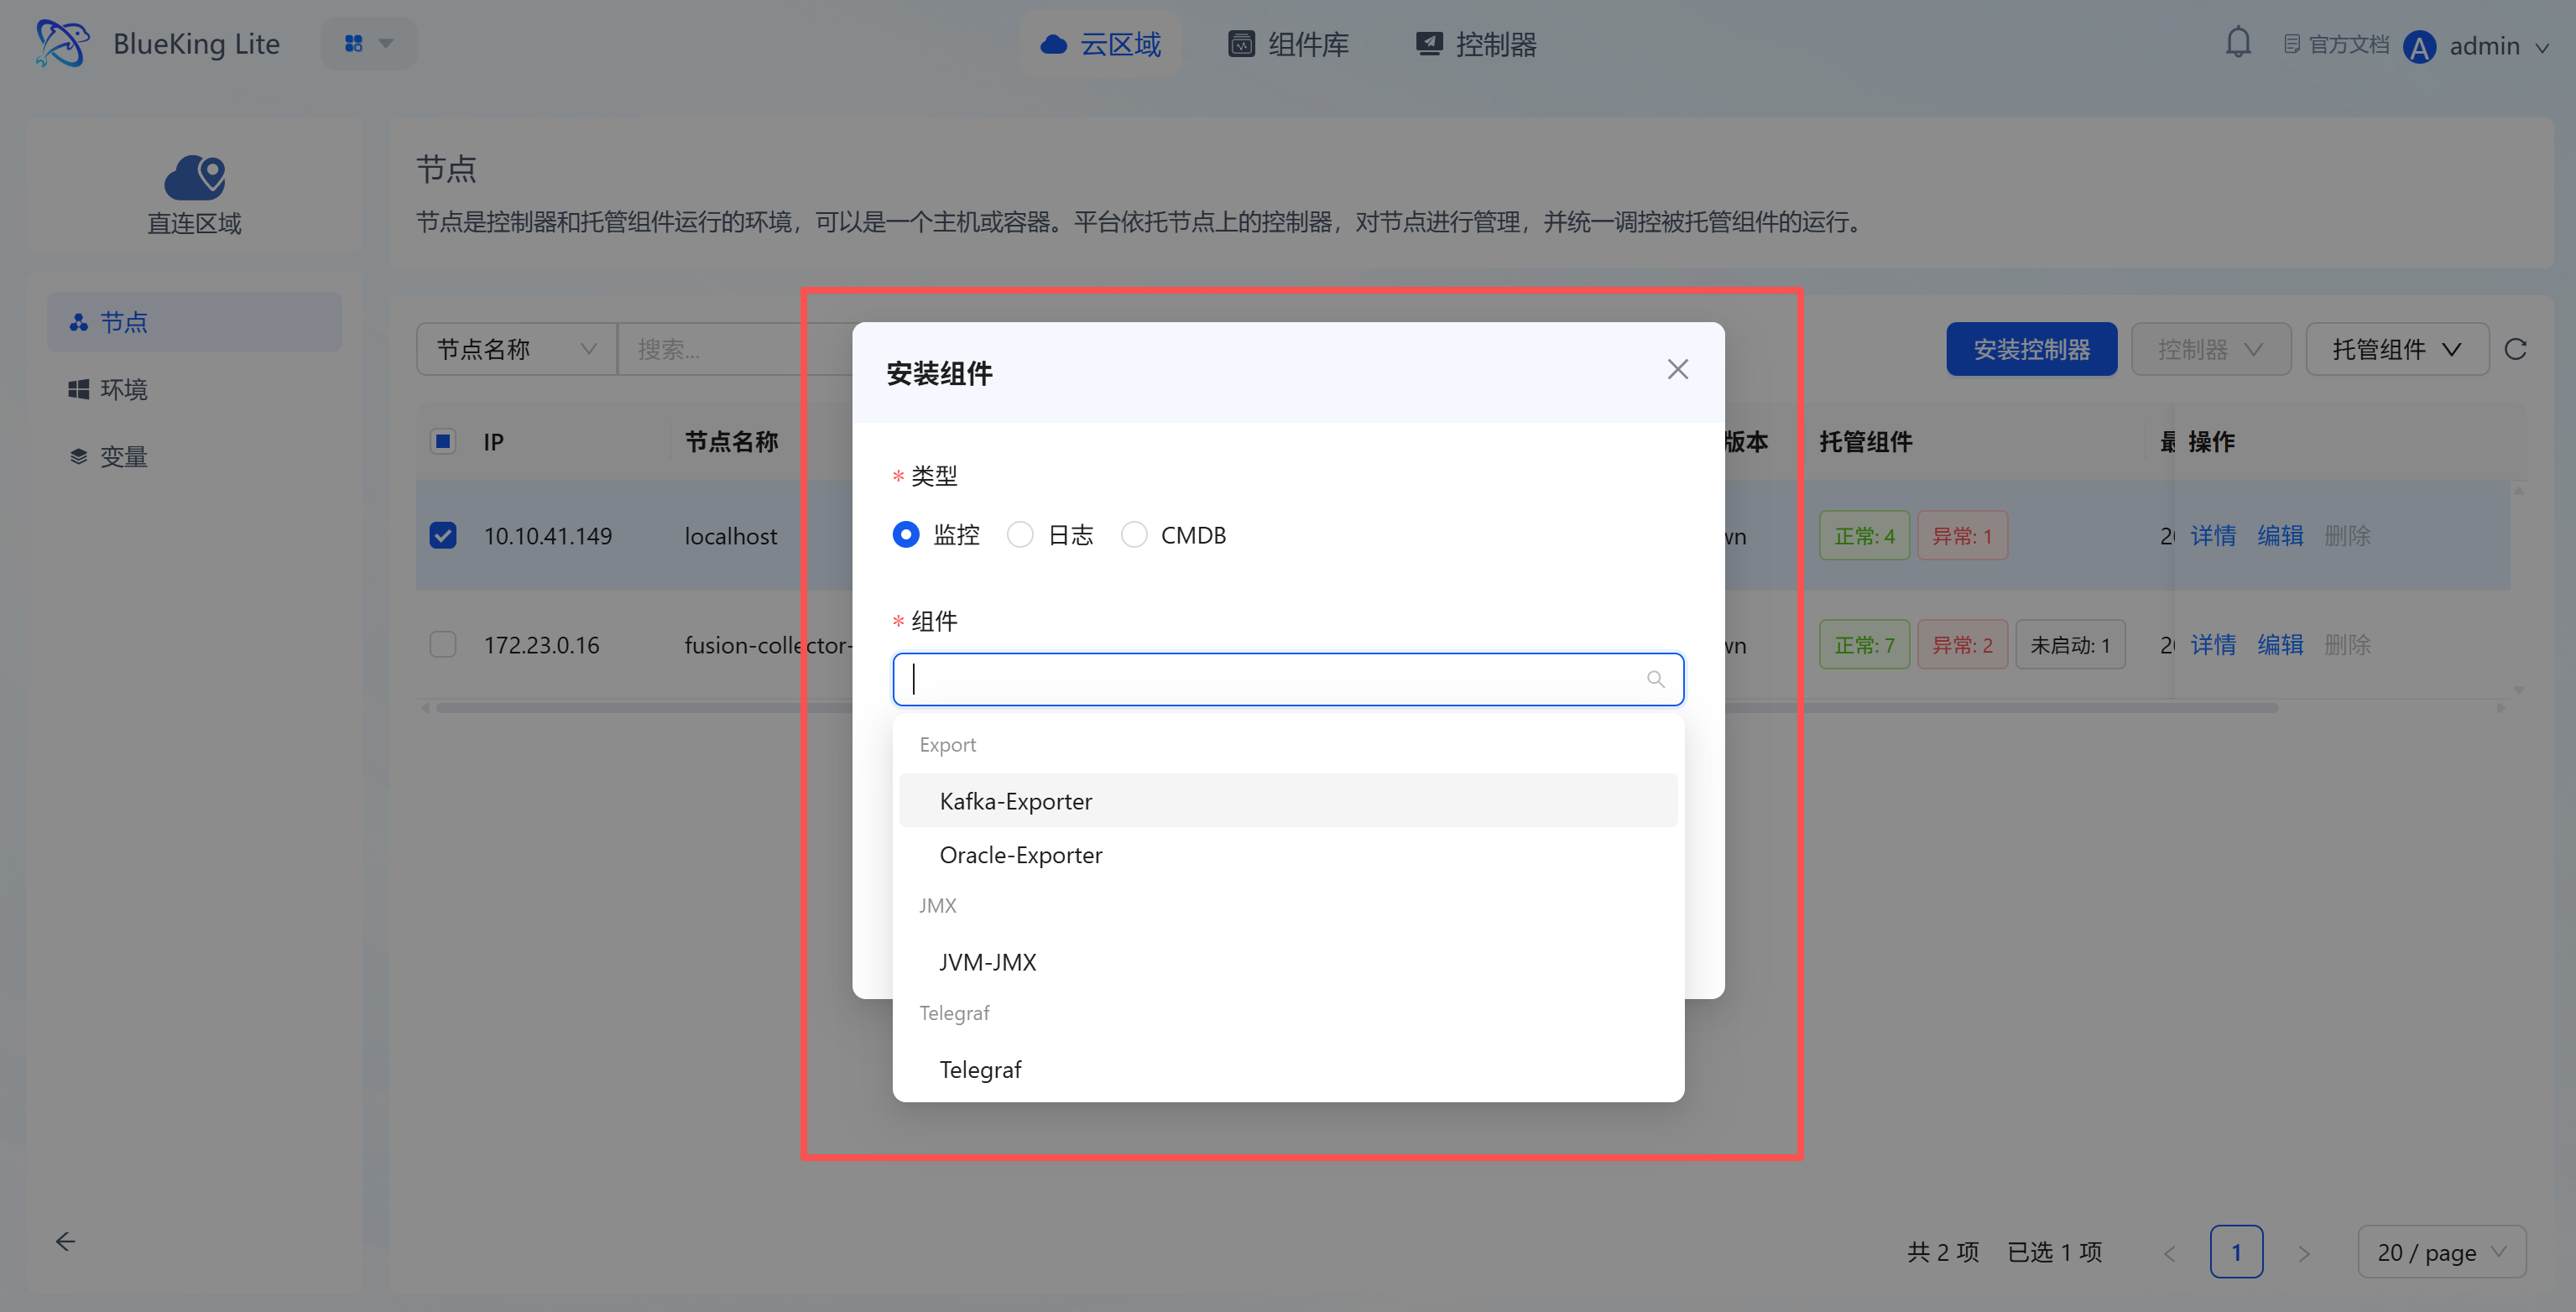
Step 2: Configure Component Information
The system provides a standardized component list for quick selection of agents/collectors to deploy. Component options are automatically filtered by the selected nodes' CPU architecture, displaying only collectors matching the node's architecture.
- In the "Install Component" dialog, select the component "Type" (e.g., "Monitoring").
- In the "Component" dropdown list, select the target component (e.g., Kafka-Exporter, Telegraf, etc.).
- In the "Version" dropdown list, select the component version matching the target node's operating system and CPU architecture.
Warning: If the selected nodes' CPU architecture has not been detected yet (
cpu_architectureis empty), the system will block access to the collector operations panel. Please complete controller installation first to allow the system to automatically record node architecture, or have administrators execute the legacy node architecture backfill command.
UI Guide:
- Component type classification: Components are categorized by business scenarios such as "Monitoring, Logging, CMDB" for quick location of target collectors.
- Version selection area: Supports selecting different component versions. The component list is pre-filtered by node CPU architecture to ensure version matching.
Step 3: Complete Component Installation
After confirming the configuration, submit the task to complete component deployment on target nodes.
- After confirming the component type and selection are correct, click the "Confirm" button in the dialog.
- After deployment is complete, you can check the component's runtime status in the "Hosted Components" column of the node list.
- If install, start, stop, or restart tasks fail, you can retry failed nodes from the progress panel.
Step 4: Edit and Apply Collection Configuration (As Needed)
After component installation, you need to assign a collection configuration for it to actually execute collection tasks.
- In the node list, click any field of the target node to open the node detail side drawer.
- The drawer displays all hosted components installed on the node along with their runtime status cards. Find the Primary Configuration and Sub-Configuration modules below the cards.
- Click the edit button for "Primary Configuration" to modify global collection rules; or create a new sub-configuration in the "Sub-Configuration" list to define specific collection tasks.
- After modifying and saving, click the "Apply" button in the corresponding component card area. The system will distribute the latest configuration file to the node's component and activate it.
- After configuration takes effect, return to the node list to observe component status changes, or continue verification with monitoring, logging, and other business modules to confirm collection results are properly recorded.